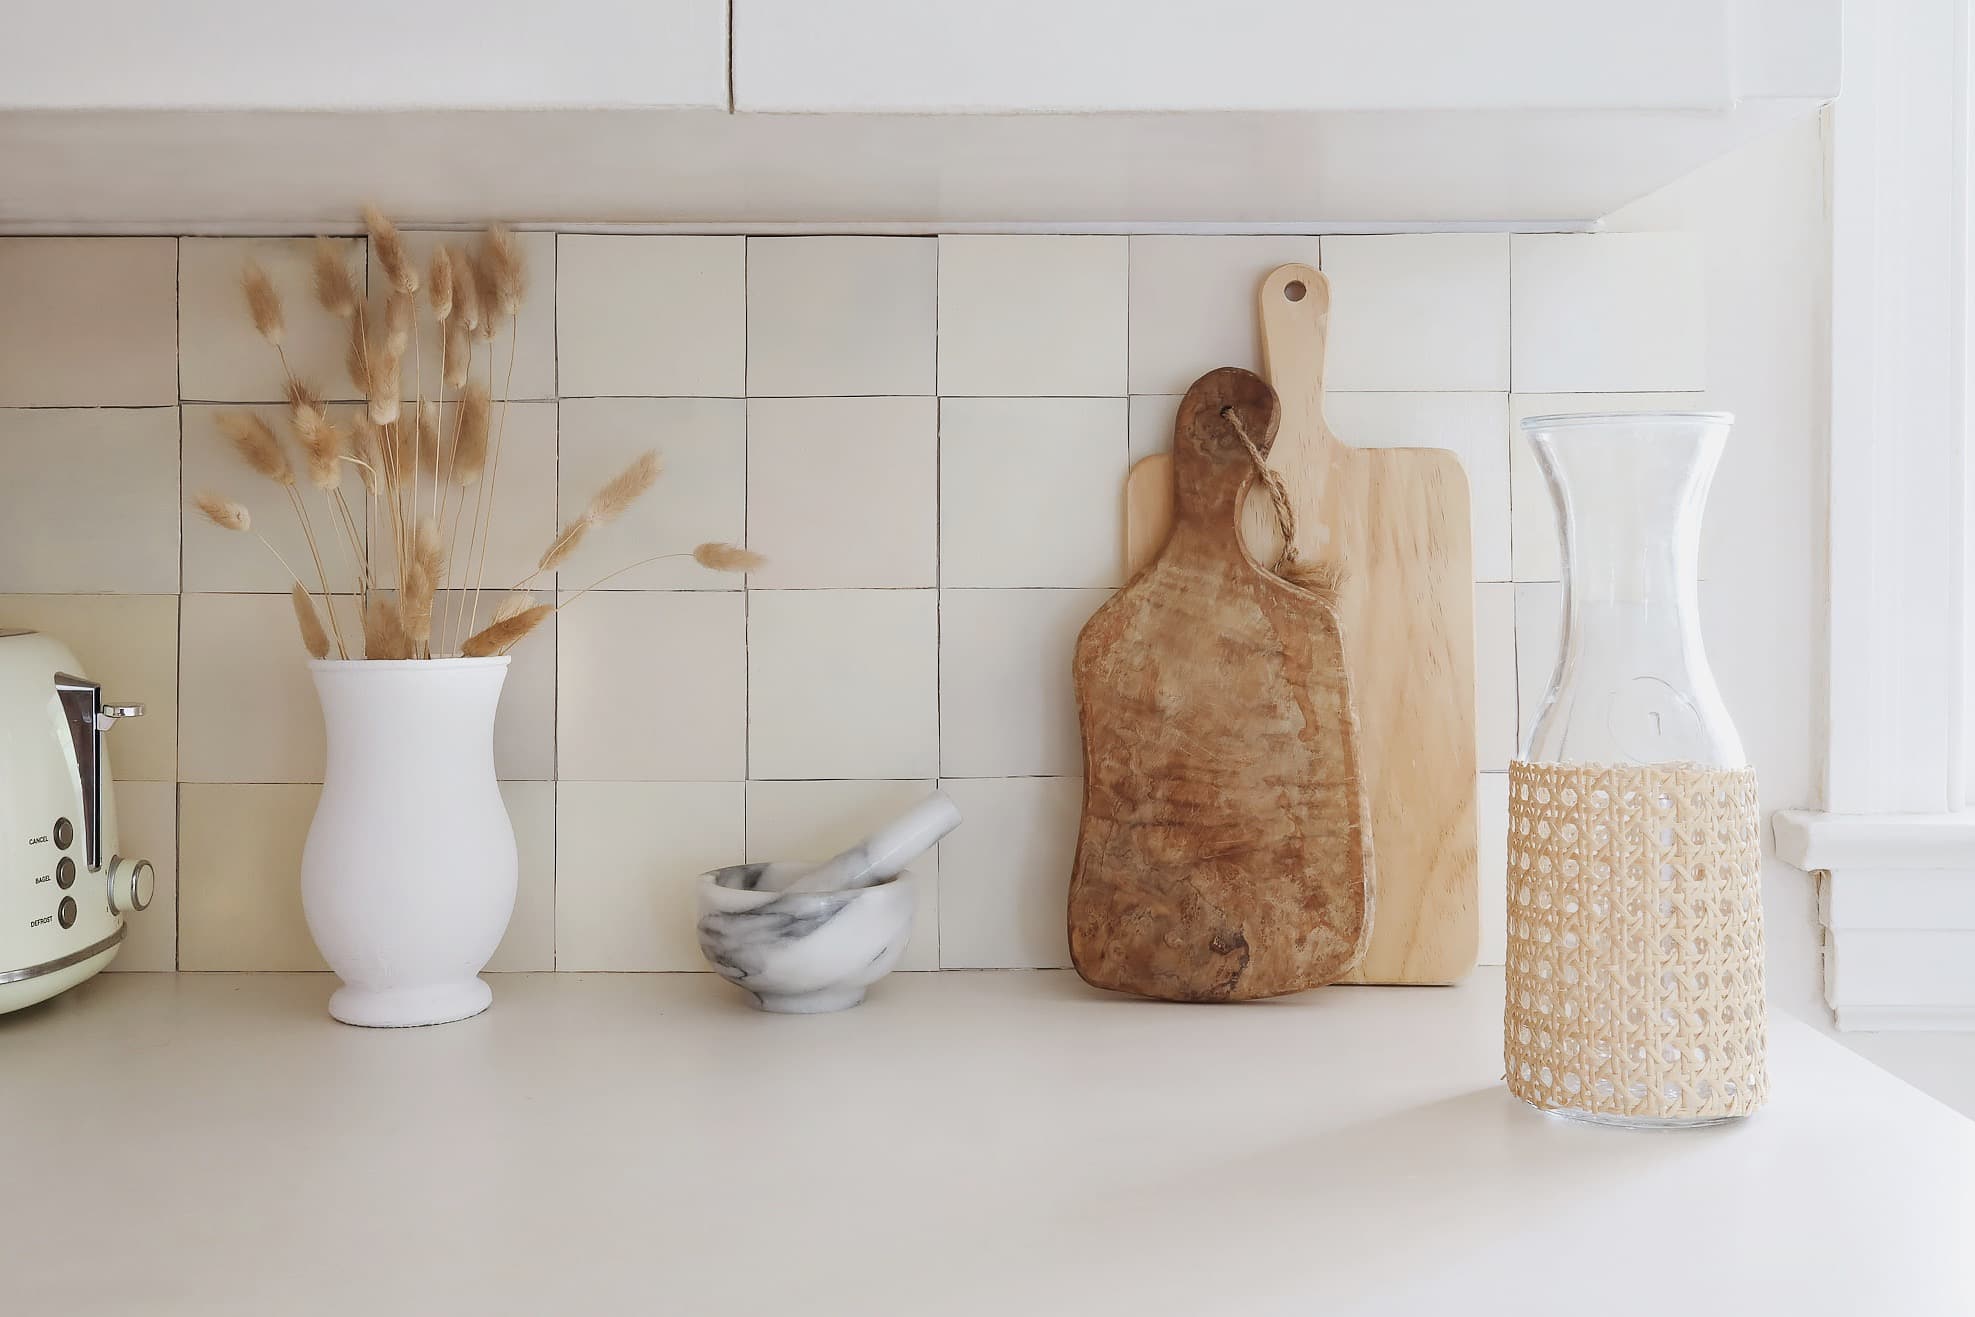
Zellige tile is having a moment in design right now, offering a perfectly imperfect alternative to subway tile.
Made by artisans in Morocco, the tiles are shaped by hand and dried in the sun before being dipped in glaze and placed in the kiln. Because of the handcrafted process, each tile is unique and contains flaws that offer a gorgeous wabi-sabi charm. It’s no wonder homeowners are flocking to use it in kitchens and bathrooms alike.
But if you’re renting or have a limited reno budget, installing an authentic Zellige tile backsplash in your space may not be possible. I was hoping to find a peel-and-stick version that offered the same vibe, but a deep dive into the internet proved futile. So I decided to create my own using vinyl floor tiles.
The process turned out to be super simple, and the result is shockingly convincing. Not bad for $23 and a few hours’ time.
Steps
Step
1
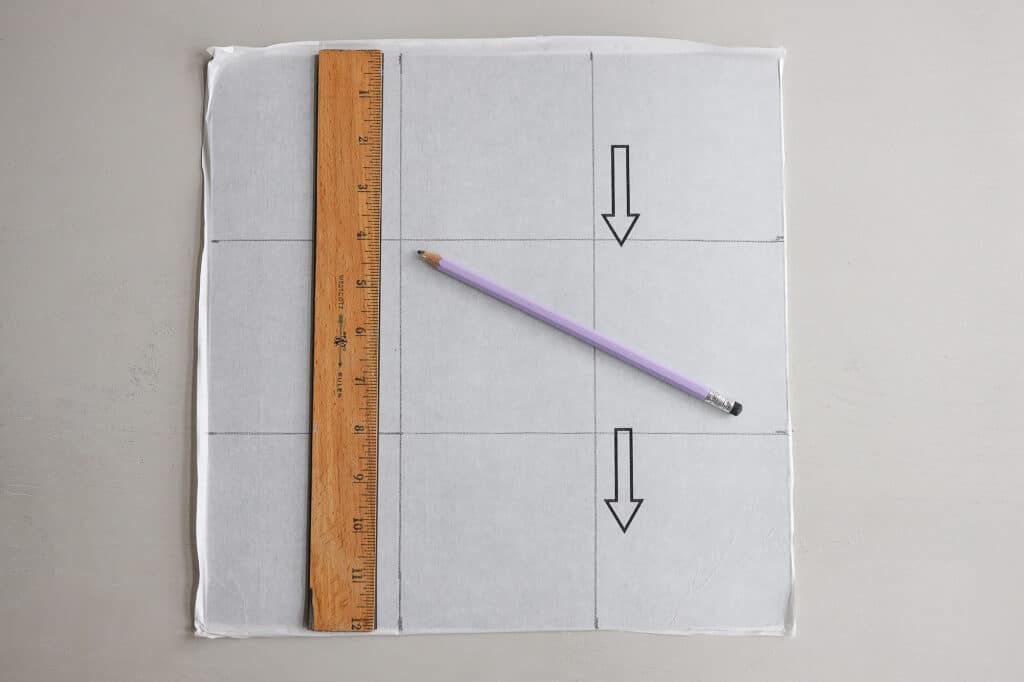
Turn the floor tile over and use a ruler to draw your cut lines on the backside. I used 12-by-12-inch floor tiles and wanted to create four-by-four-inch wall tiles, so I divided each tile into nine equal squares.
Step
2
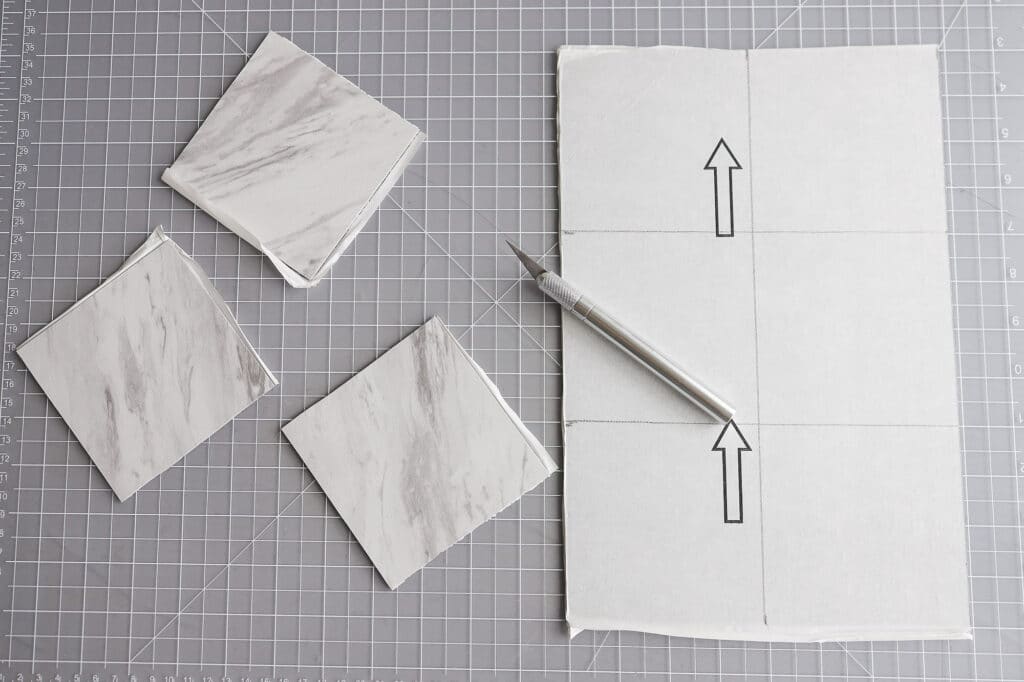
Put the tile on a cutting mat (or scrap cardboard) and use an Xacto knife to score the cut lines. Bend along the scored lines until the tile breaks. Then turn the tile over and score along the front side to cut through the tile completely.
Step
3
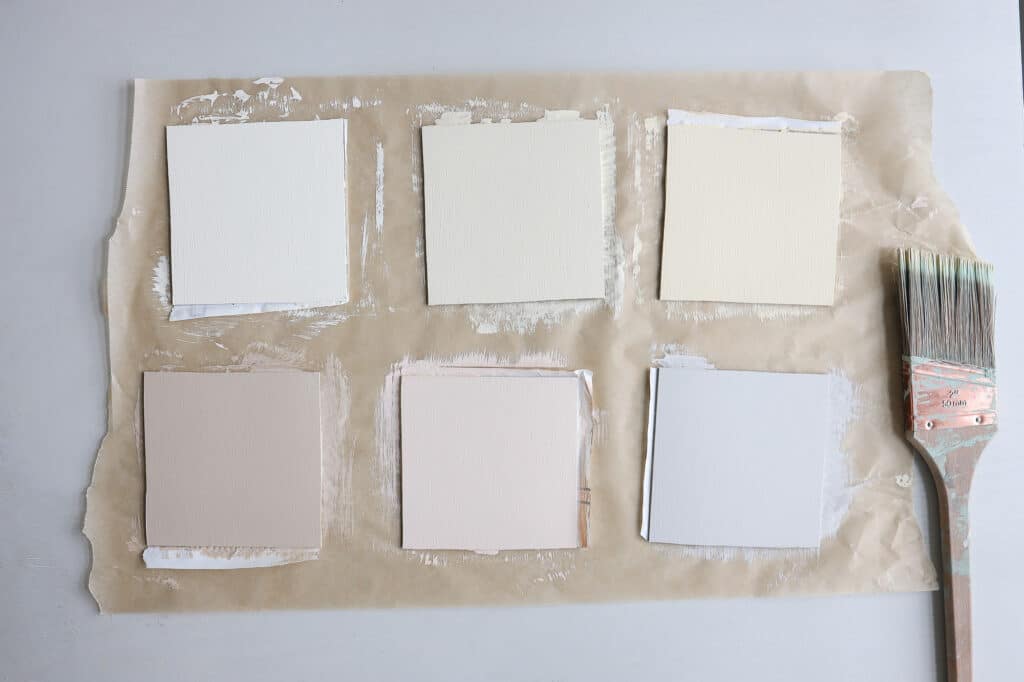
Paint the tiles in a variety of tonal hues (part of the charm of Zellige tile is that no two are the exact same color). Since I wanted to go with a creamy palette, I painted the tiles in a variety of off-white colors consisting of ivory, antique white, taupe, nude and a soft gray. You may need more than one coat to cover the vinyl pattern completely. Allow the final coat to dry at least two hours.
Step
4
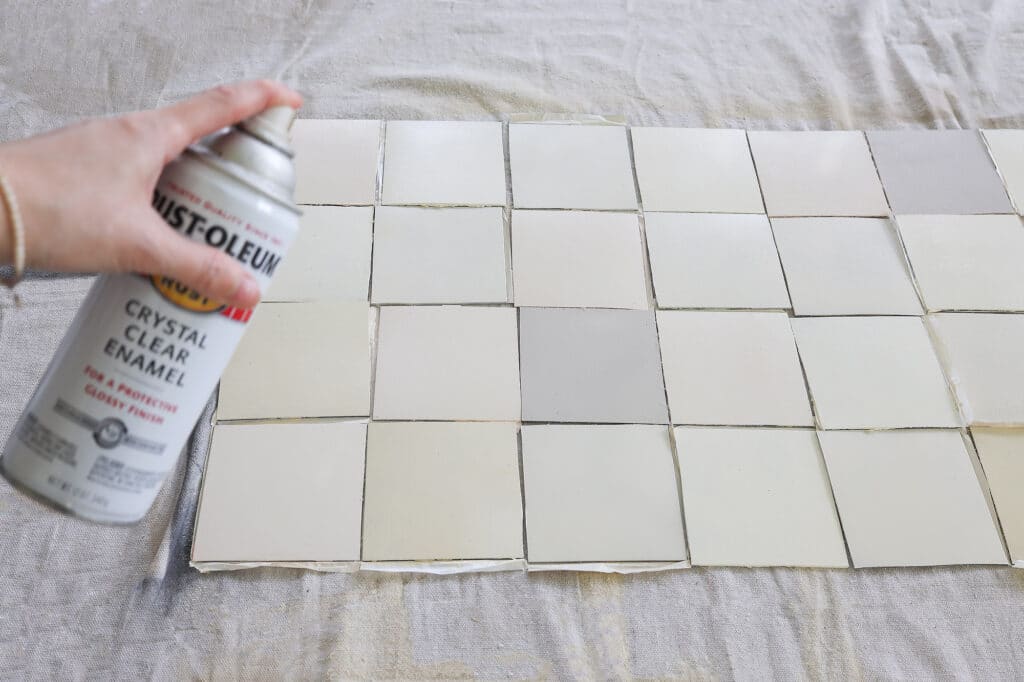
Once the paint has dried, spray a glossy topcoat over the tiles. This will both seal the paint and make the tiles look more authentic. Allow the topcoat to dry an hour.
Step
5
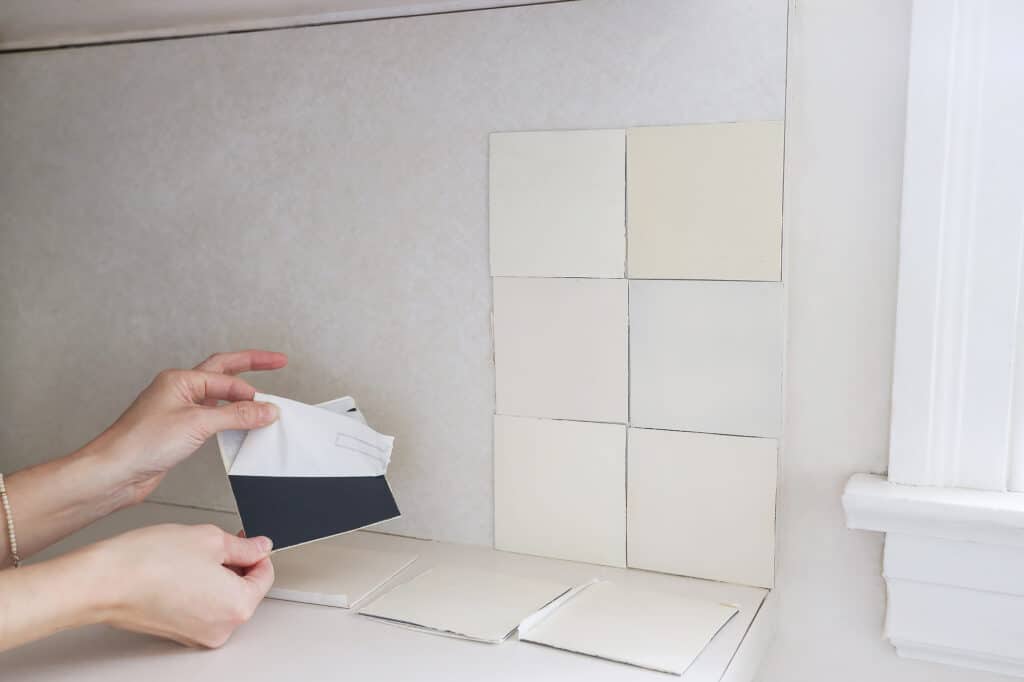
Time to install! Make sure your backsplash surface is clean first. Then peel off the backing from the tiles and press them firmly to the surface, starting at the bottom and working up. When you get to any areas where a tile needs to be cut (like around outlets), simply mark the cut lines on the back of the tile, score and cut.
Step
6
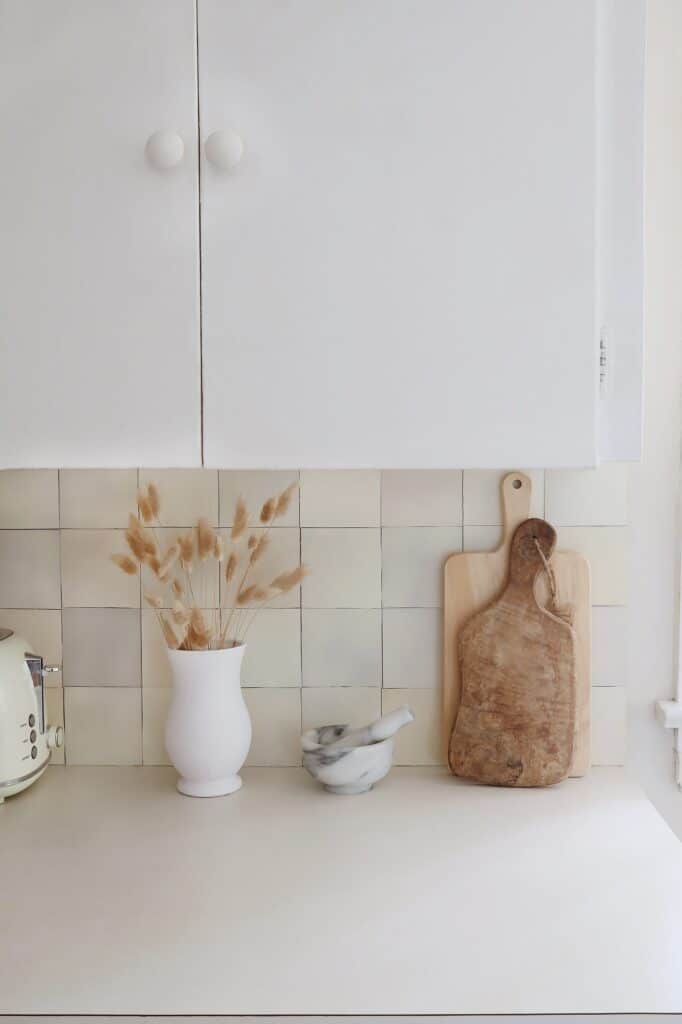
That’s it! Your beautiful (and removable) new backsplash is done and ready to enjoy.
Design and Photography by Trisha Sprouse
More Stories...

The space is decked out in Semihandmade Moss Quarterline and Tahoe.

House flippers and mom-daughter duo Lacey and Audrey Soslow created the kitchen of their (buyers’) dreams.

Malene Barnett teamed up with designer Leyden Lewis to create a space representative of her work.