There’s nothing better than scoring the perfect vintage find to layer some charm and character into your space.
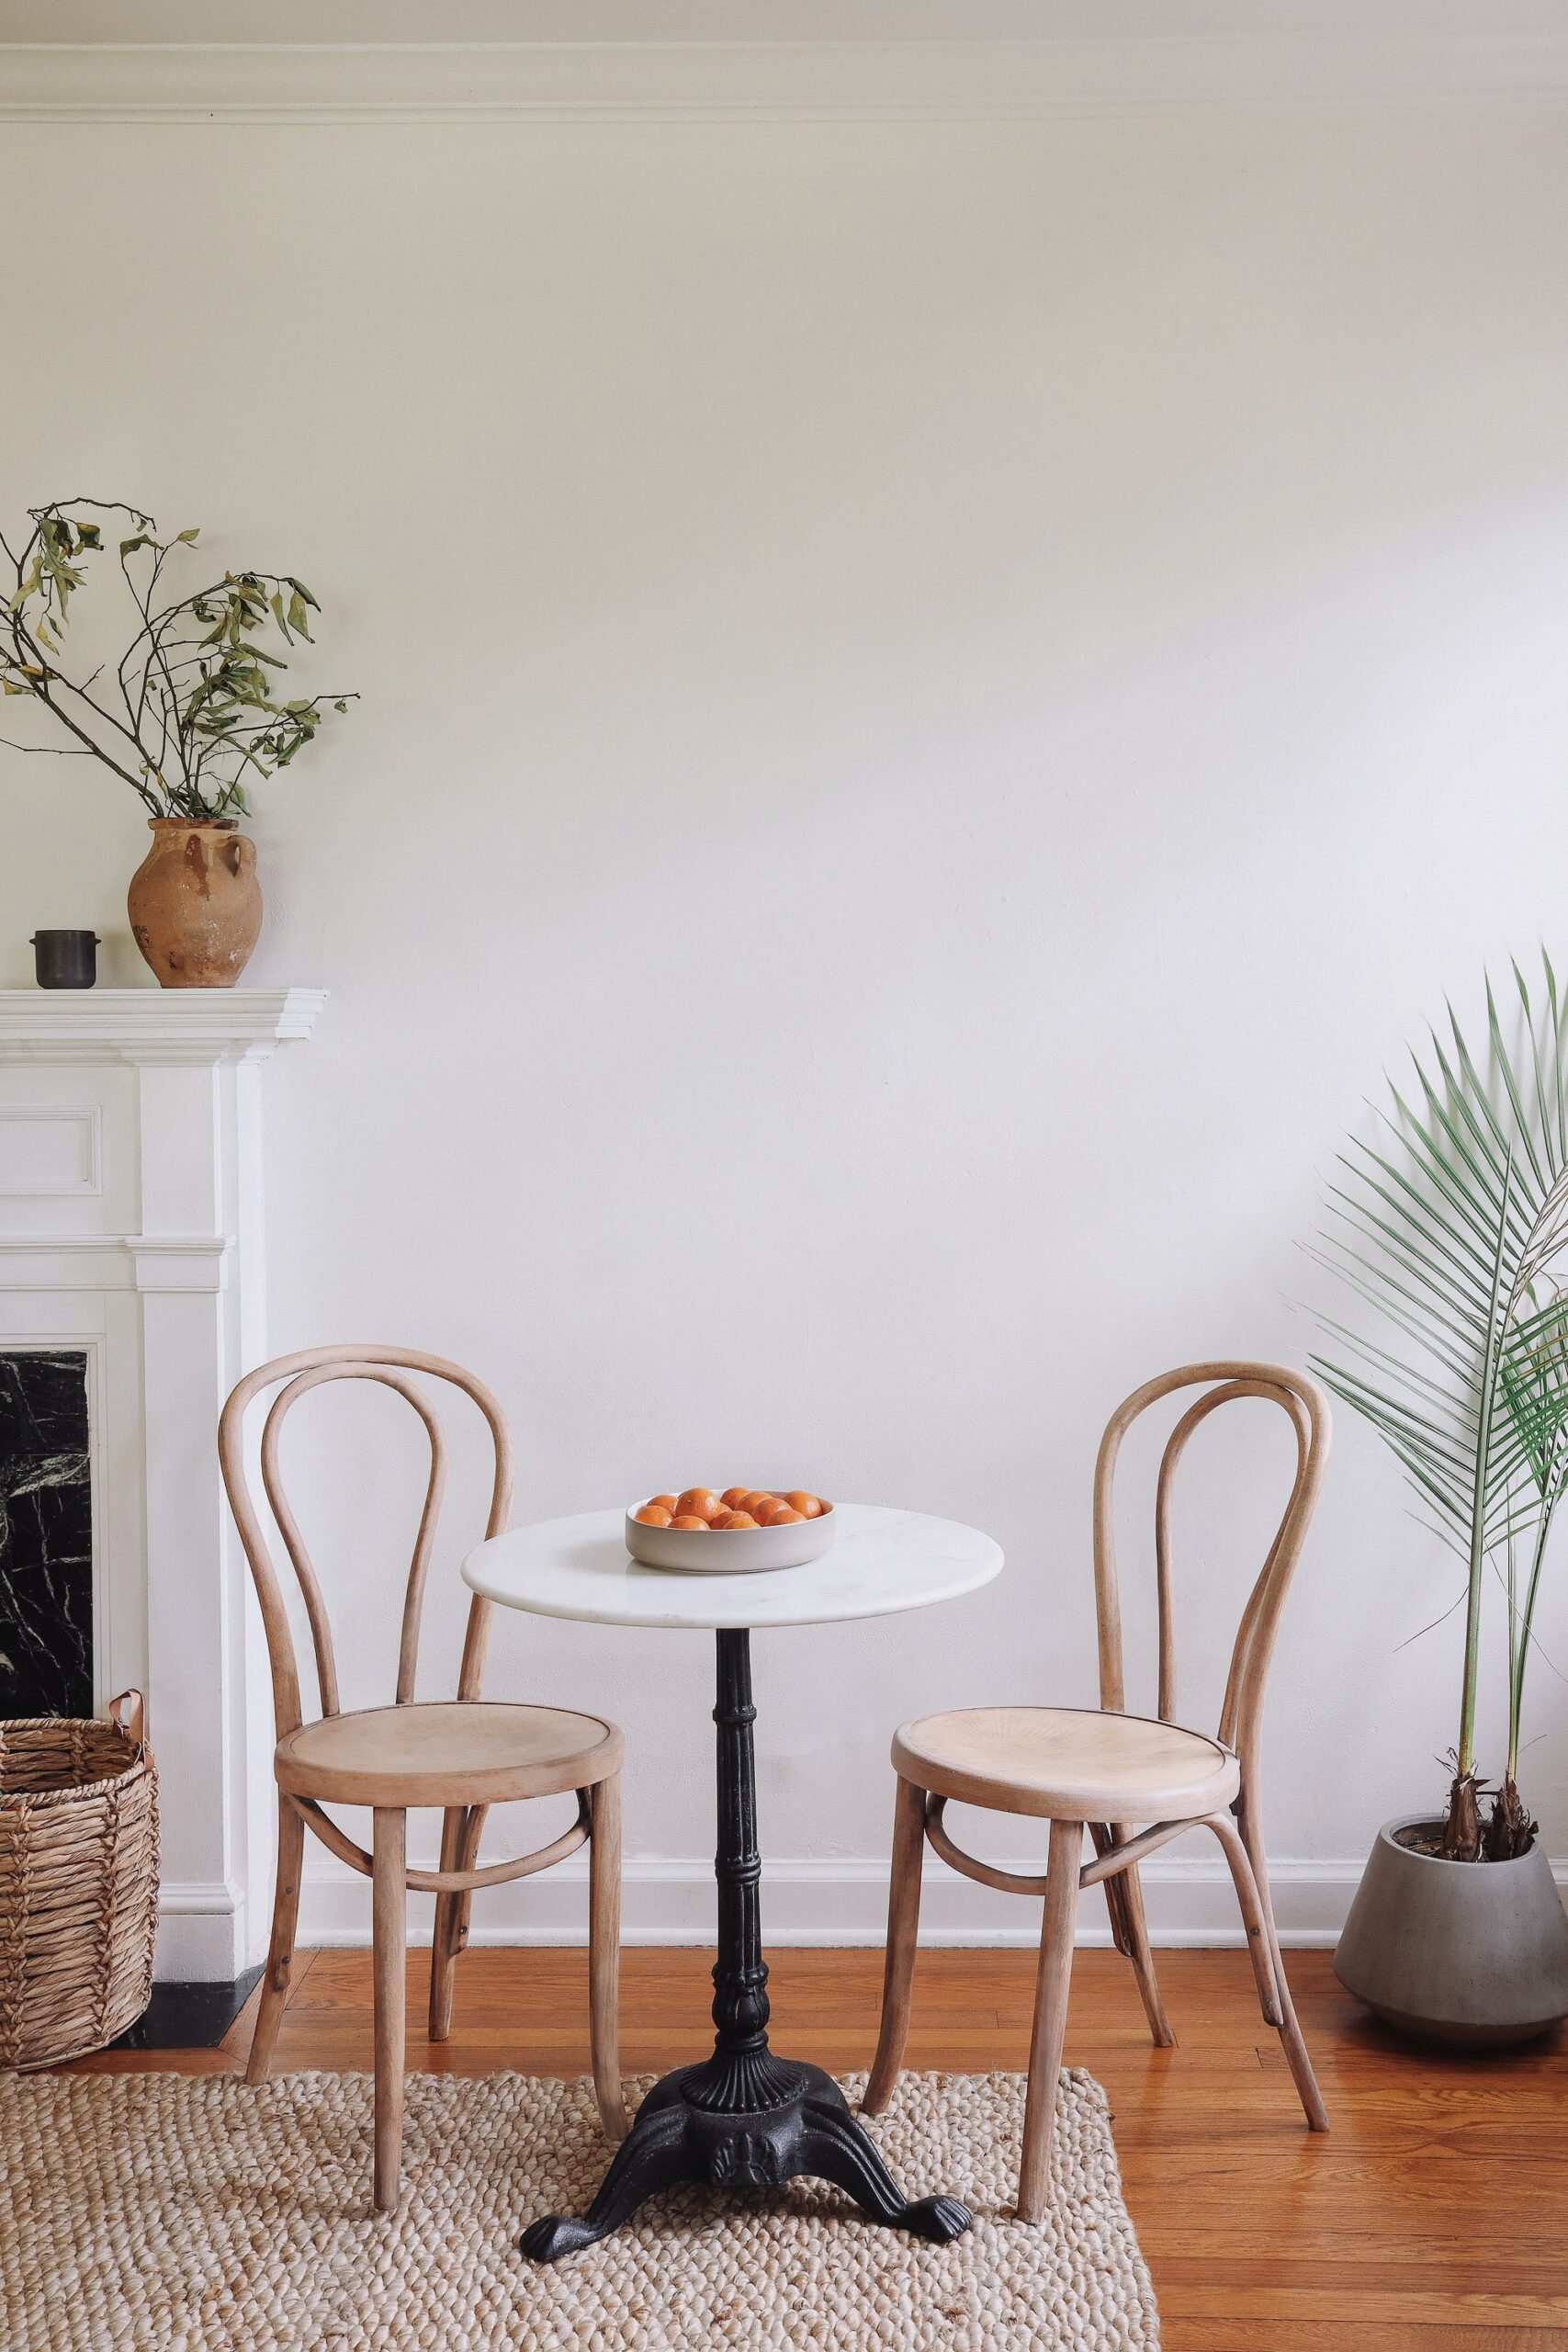
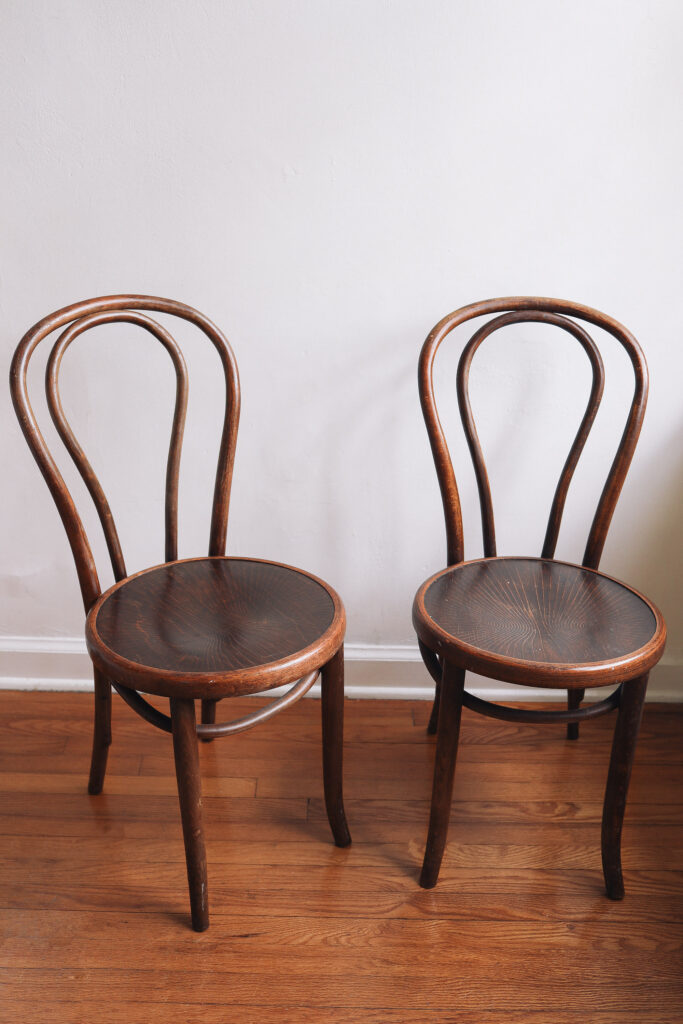
Maybe your new piece has great lines, an interesting texture, or a really beautiful patina. In this case, my classic bentwood chairs, originally designed in the 1800s by Michael Thonet, had all three. My husband and I have always loved the eye-catching shape, so when we spotted a pair on Facebook Marketplace for $30, we snagged them immediately.
Though the wear-and-tear on the chairs was only minor, we were craving a bit of a Scandinavian look to pair with our bistro table, so we decided to strip off the old walnut-colored stain and give them a sun-bleached look with a modern matte finish. We love that we were able to upcycle existing furniture into new-to-us chairs instead of buying something completely new! Here’s how we did it in just one weekend…
First, let’s have a look at how the chairs looked prior to refinishing them:
Steps
Step
1
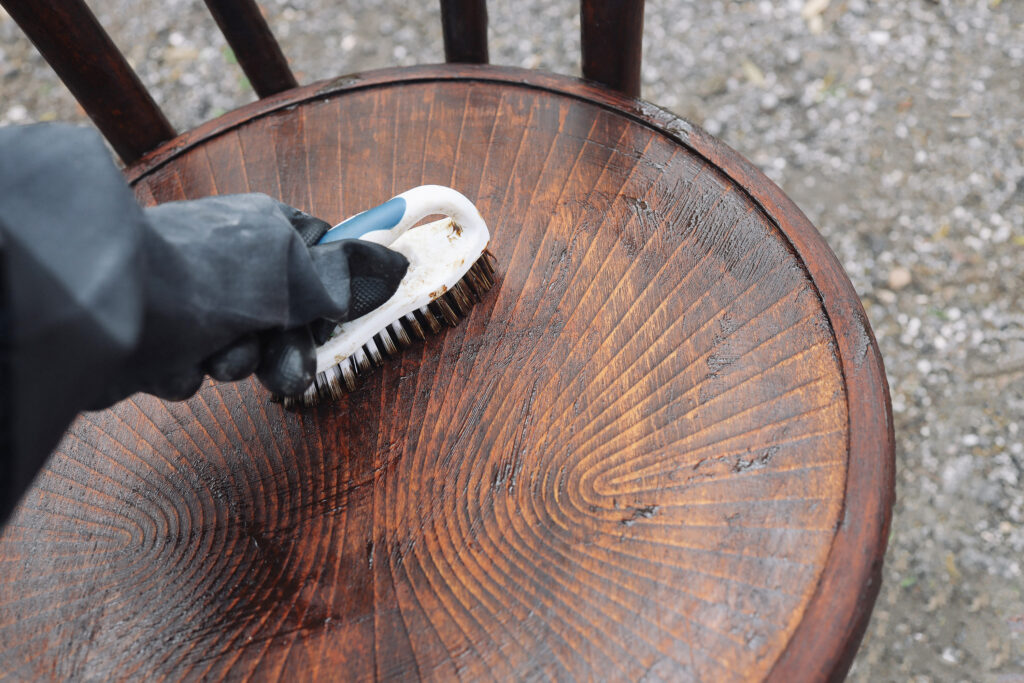
Be sure to put on rubber gloves and a respirator mask before handling any chemicals, and work outside or in a well-ventilated area. It’s also worth noting that older furniture made before the 1970s may contain lead, so we recommend using a lead test kit before getting started.
Using a cheap chip brush, paint a generous layer of paint stripper all over the entire chair. Let it sit for 15 to 30 minutes (or according to the manufacturer’s directions), but don’t let it dry out.

Step
2
Scrub the stain off with a stiff bristle brush. You’ll need to continuously rinse the brush with water as you work, since it gets clogged easily with the stain. If you notice that the stripper has dried in any areas before you’ve had a chance to scrub, simply brush a bit more stripper on the dry spots before scrubbing.
Step
3
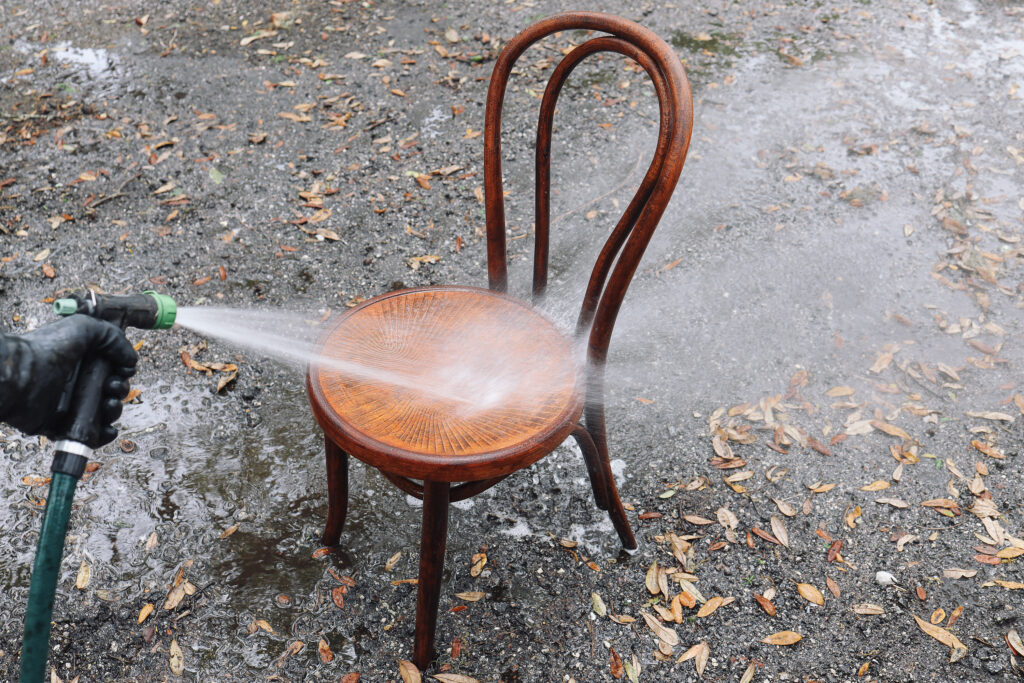
Once you’ve scrubbed off as much of the stain as you can, rinse the chair thoroughly with a water hose.
Step
4
While the chair is still wet, use a foam brush to paint a generous layer of wood cleaner onto the entire chair. Let it sit for about 15 minutes, and then give the chair a good scrub before rinsing the cleaner off with water. The cleaner neutralizes the paint stripper and helps clean off any residual stain.

Step
5
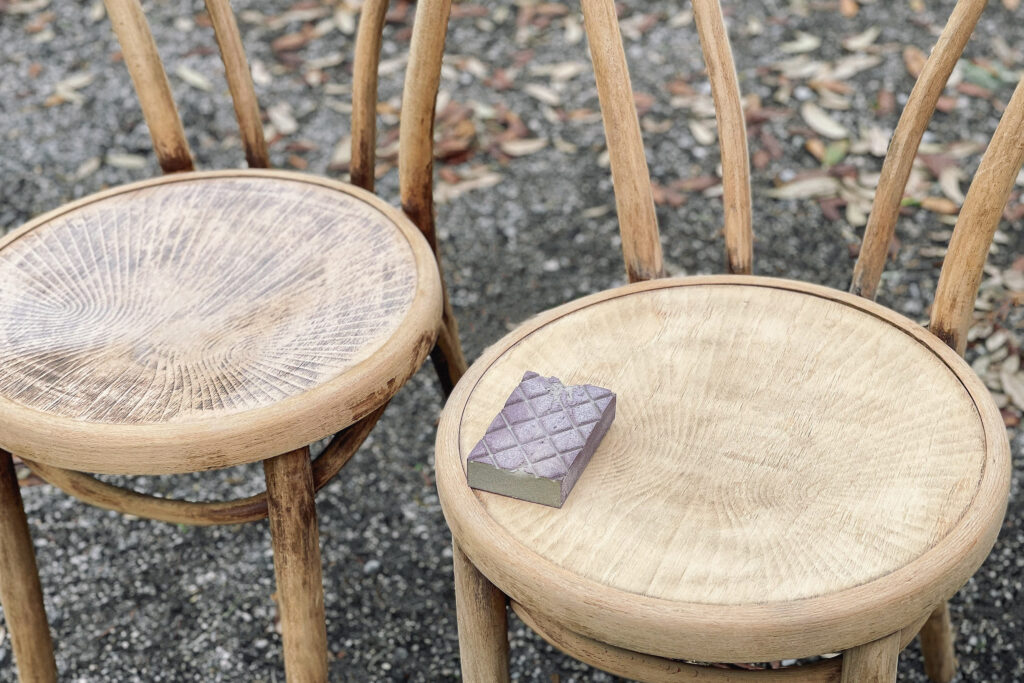
Allow the chairs to dry completely overnight. Once dry, use either an orbital sander or 80-grit sanding sponge to sand off any remaining stain from the chairs. (You can see the difference sanding makes between the sanded chair on the right and the unsanded chair on the left.) Wipe away any sanding dust with a damp cloth.
Step
6
Use a foam brush or chip brush to apply a thin layer of wood stain in your desired color (we used the color “pickled oak”). Paint in the direction of the wood grain, and immediately wipe away any excess with a clean rag or paper towel. Allow the stain to dry completely.

Step
7
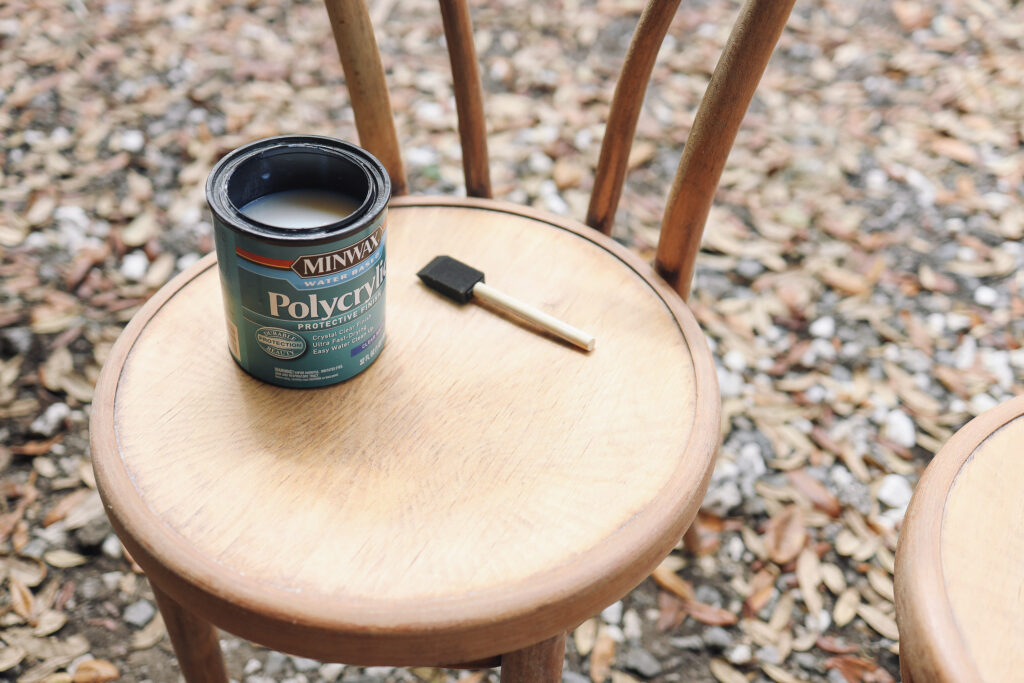
Once the stain has dried, paint two coats of clear matte topcoat to protect the new stain and seal it in. Allow the topcoat to dry completely overnight before using the chairs.
Step
8
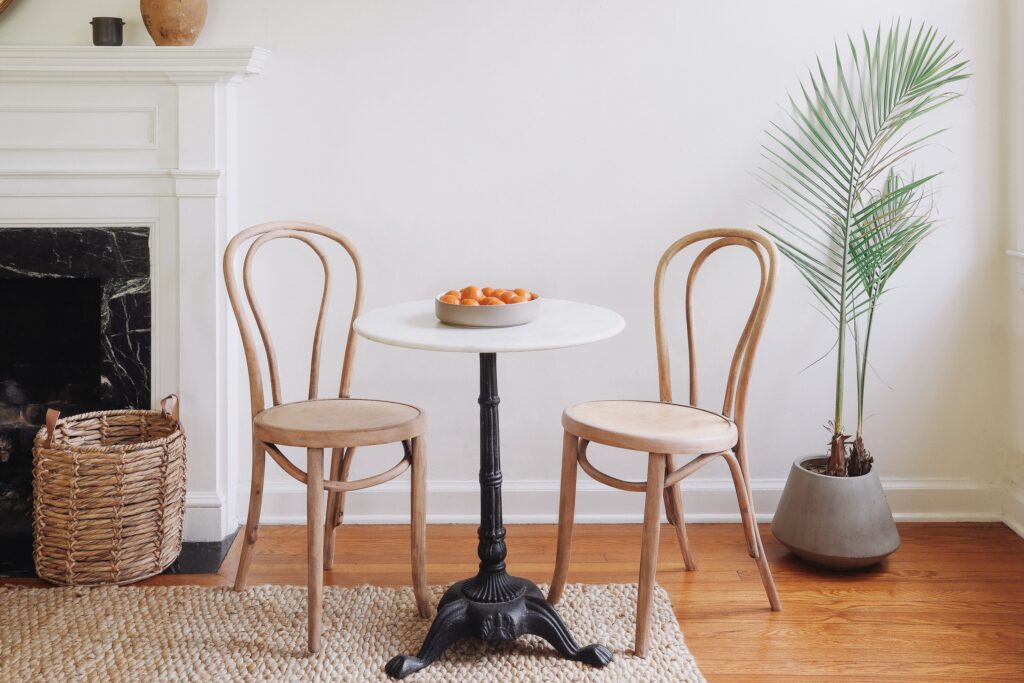
Now you’re all set to enjoy your new-to-you bentwood chairs!
Processed with VSCO with m5 preset
More Stories...

The space is decked out in Semihandmade Moss Quarterline and Tahoe.

House flippers and mom-daughter duo Lacey and Audrey Soslow created the kitchen of their (buyers’) dreams.

Malene Barnett teamed up with designer Leyden Lewis to create a space representative of her work.
Comments (1)
Great article (although I would recommend some other products for the finish). I am looking for a table exactly like your marble top bistro one. Any suggestions?