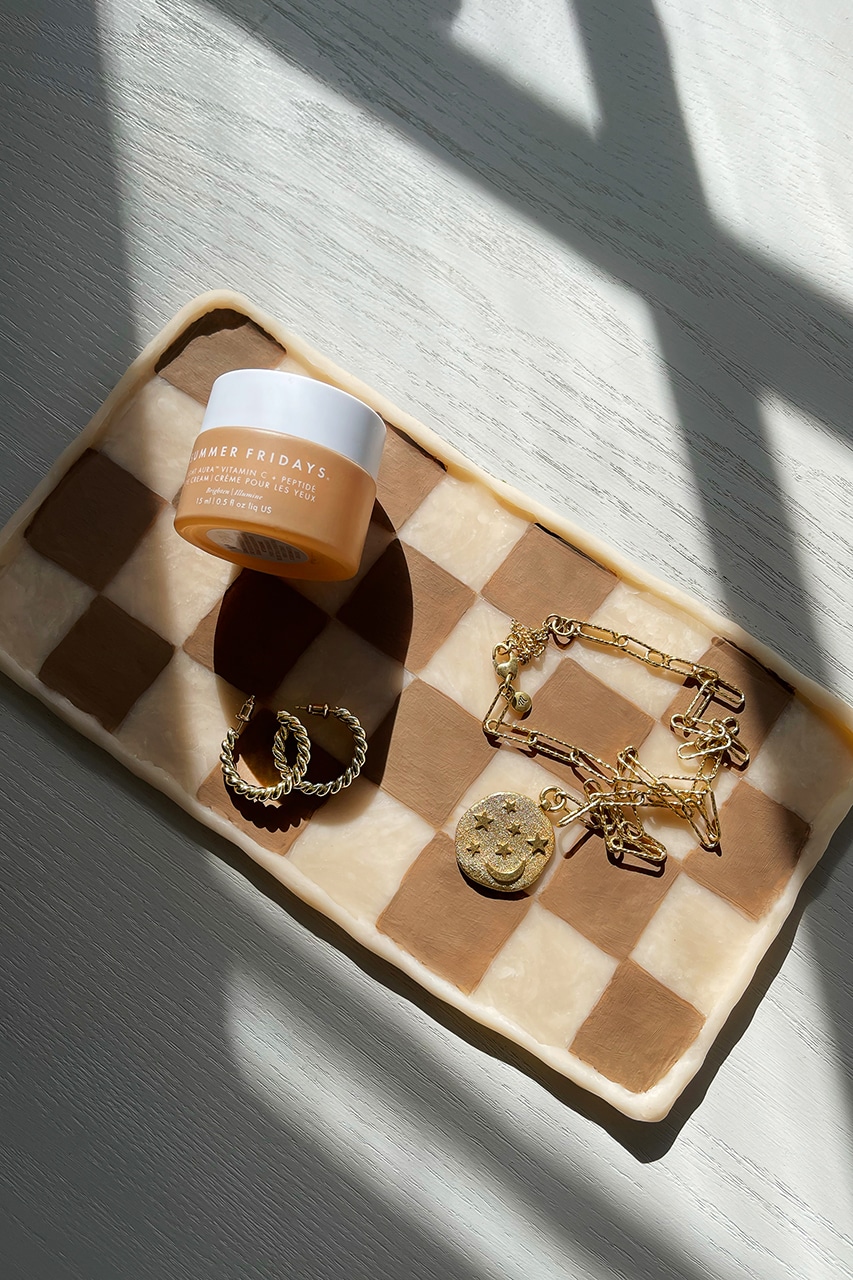
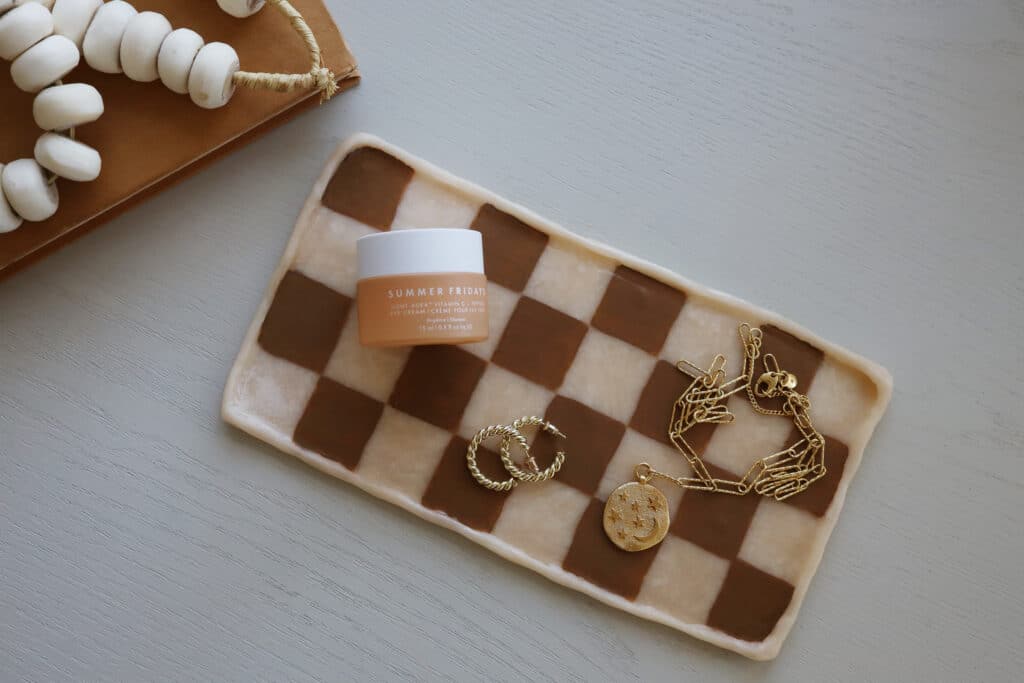
A hodgepodge of accessories strewn on top of a dresser or counter feels like clutter, but a trinket tray magically transforms them into a curated collection.
Clearly defined borders are the key to corraling your prized possessions into a nice, tidy display. Add a favorite pattern or color, and your tiny tray can make a pretty big design statement too.
In my case, I needed something to organize a few pieces of jewelry that I wear daily, as well as a couple of skincare products that I apply religiously. Since I had some oven-bake clay left over (from this project and this one), I made a simple tray and painted it with a stylish checkerboard pattern. Now my things are easier to access and prettier to look at.
Ready to make one for yourself? Order all of the supplies online and pencil it in for an easy and enjoyable afternoon craft session.
Steps
Step
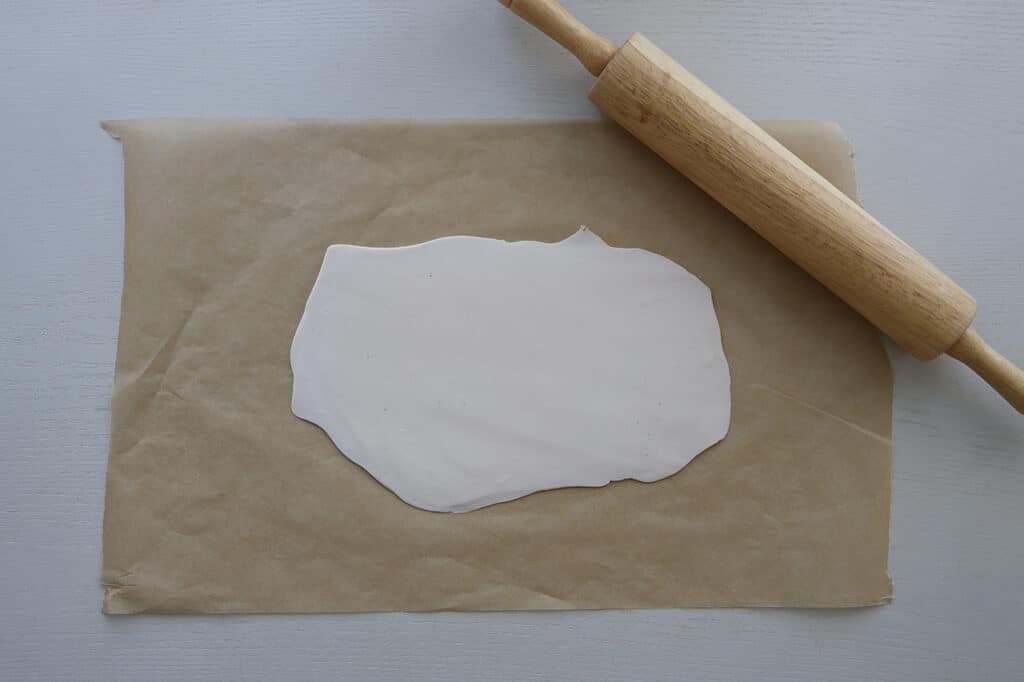
1
Work the clay in your hands for a few minutes to warm and make it more malleable, and then roll flat on a piece of parchment paper until it’s approximately 1/2-inch thick. Tip: I used a clay color called “Translucent” because it takes on a pink marble-like finish after it bakes.
Step
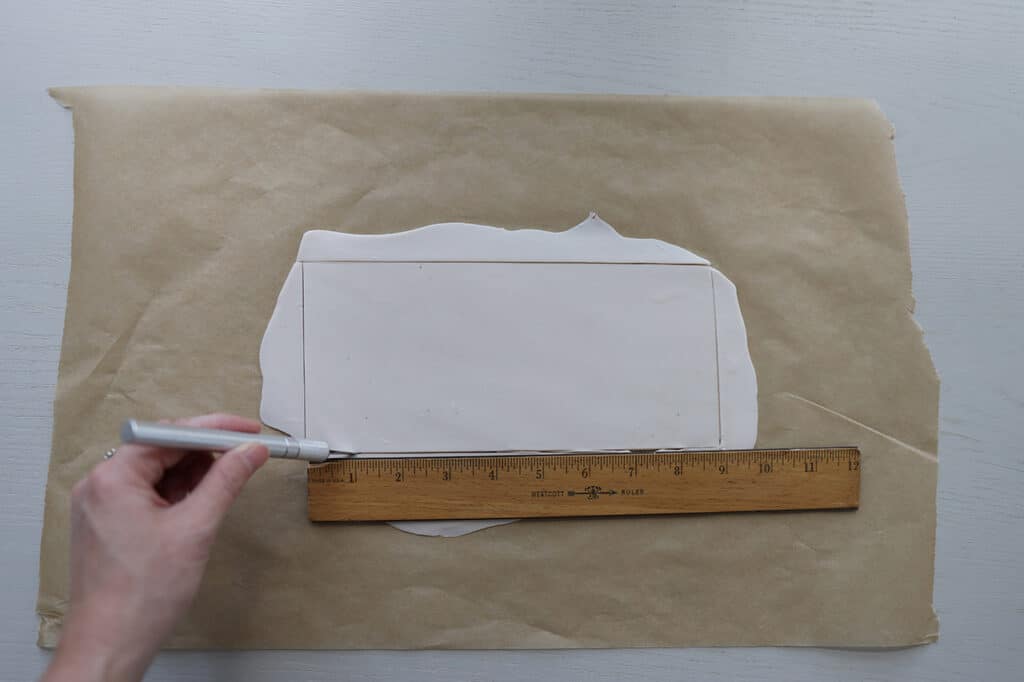
2
Cut out a rectangle with an X-acto knife, using a ruler as a guide. I cut my rectangle to be 9 inches long and 5 inches wide.
Step
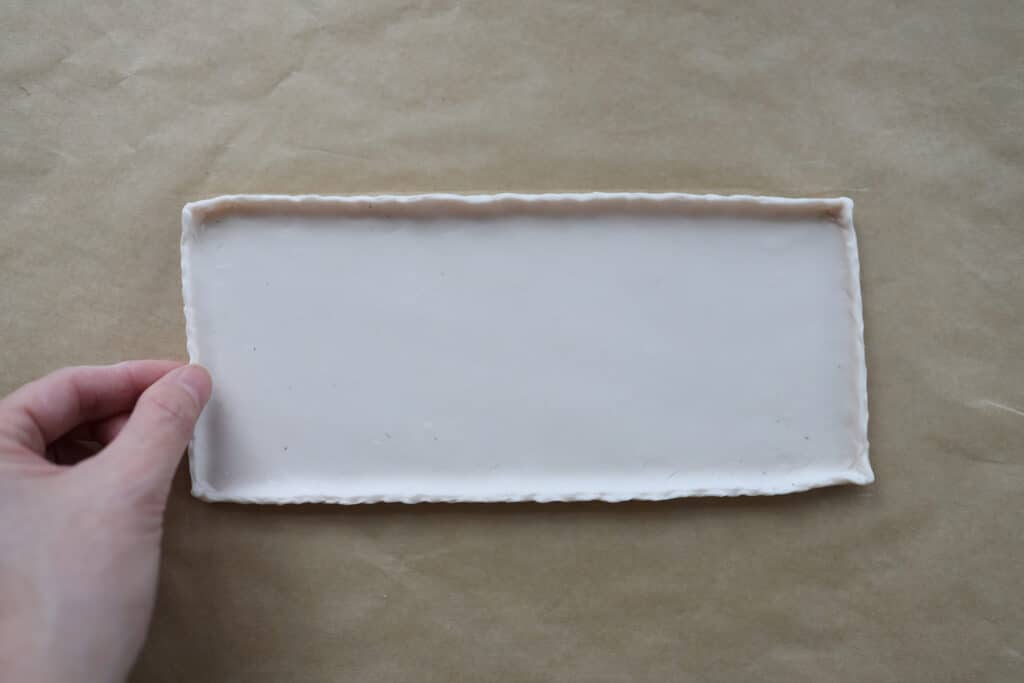
3
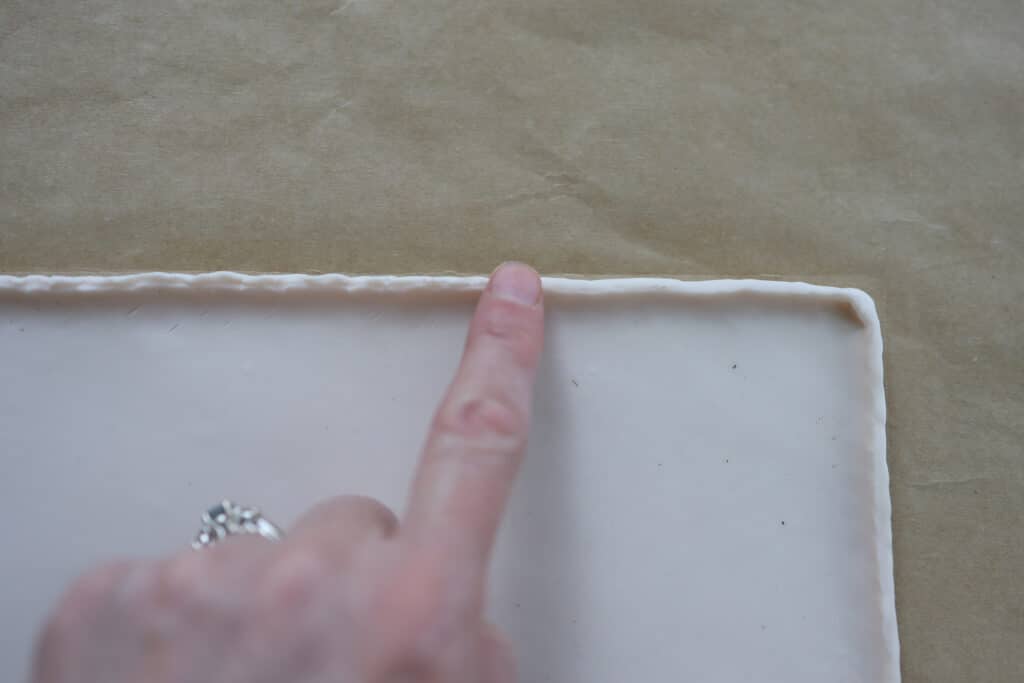
Pinch around the perimeter of the rectangle to create a lip around the entire tray. If you’ve ever made a pie or tart crust, it’s similar.
Step
4
Run your fingertip around the lip to smooth. It doesn’t have to be perfect but think less pie crust and more artisanal tray.
Step
5
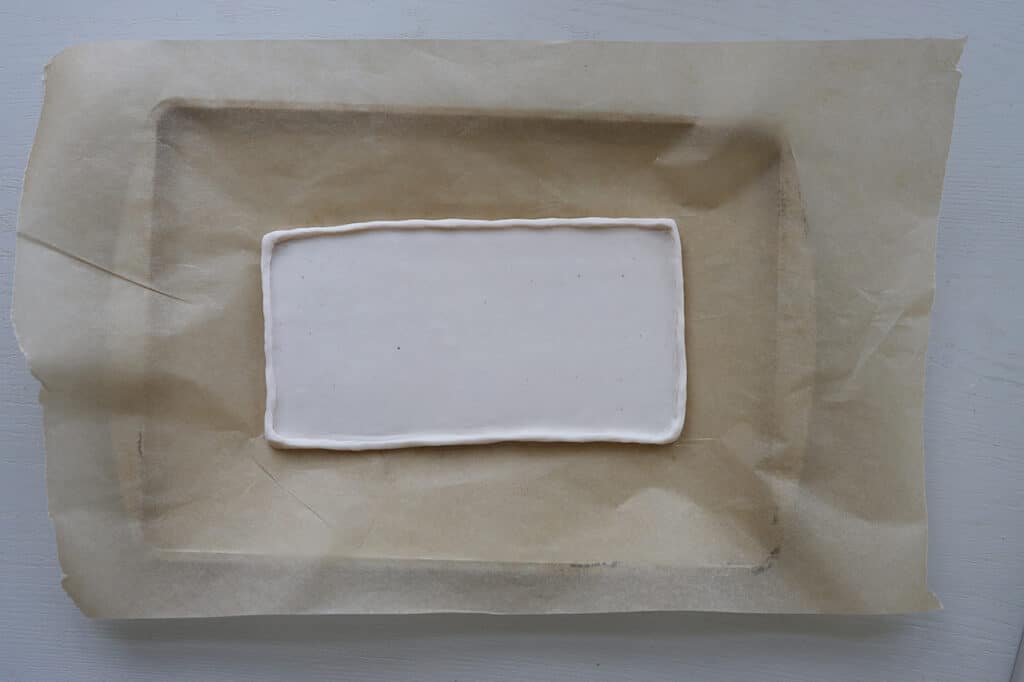
Carefully lift the parchment paper and place on a baking sheet. Bake at 275 degrees Fahrenheit for 20 minutes. Let cool completely for about 30 minutes.
Step
6
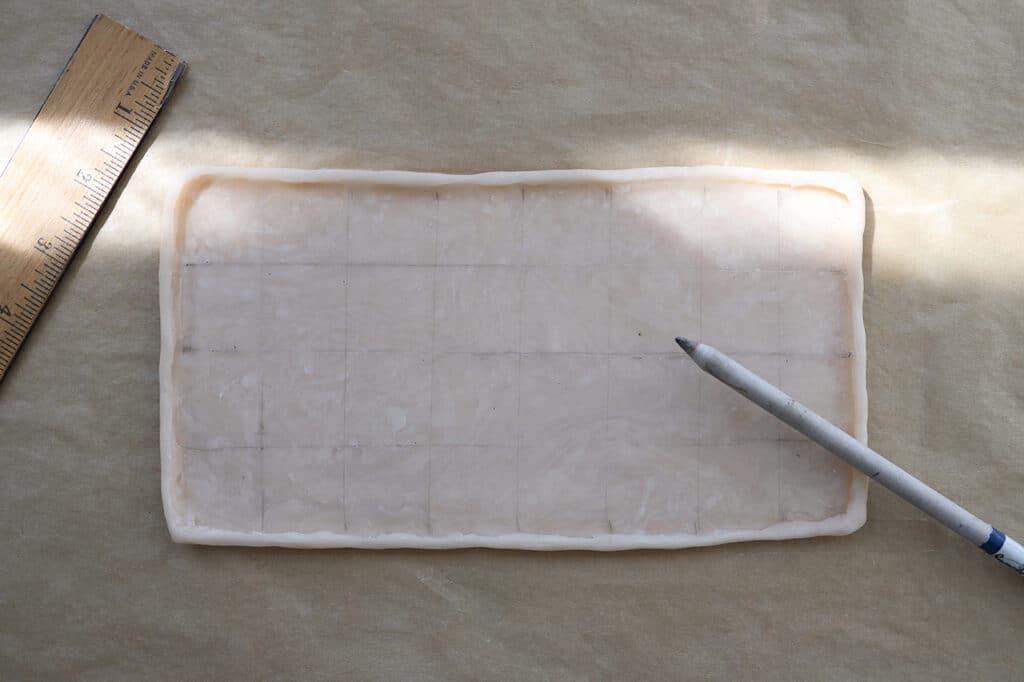
Use a ruler and pencil to lightly draw a grid pattern on the tray. I made each square 1.1 inches by 1.1 inches to give me eight rows on the long side and four rows on the shorter side.
Step
7
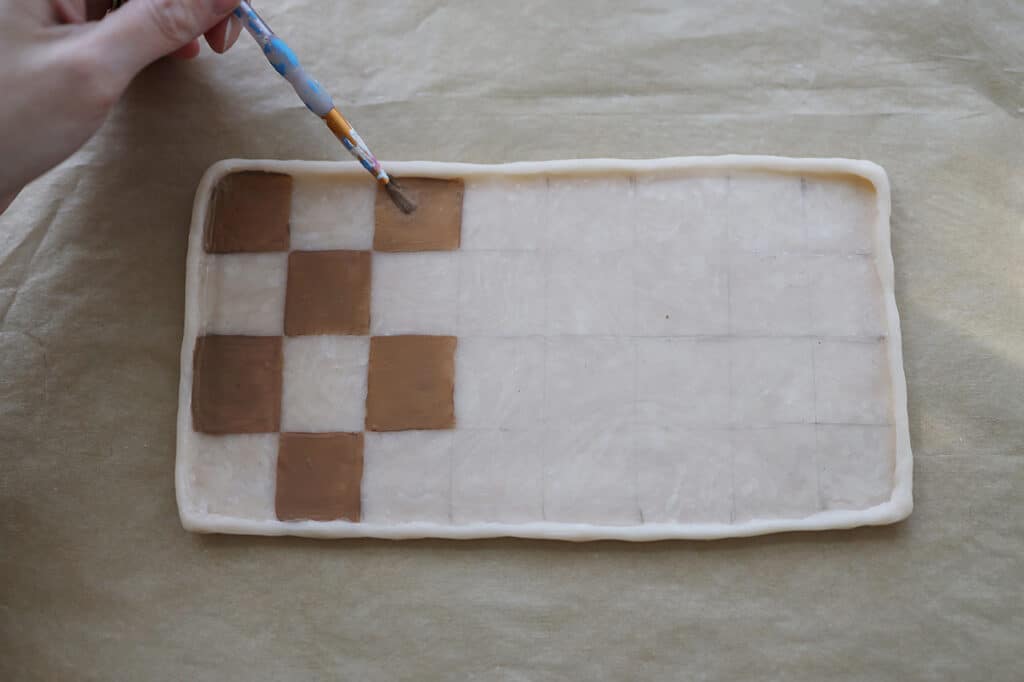
Use a fine-tip paintbrush to paint the squares with your desired colors. I opted to paint every other square with a beige color, and left the remaining squares unpainted because I wanted the pink marble-esque pattern to show. Let the first coat dry for 15 minutes, and then paint a second coat. Tip: If you need to clean up any paint lines or edges, use a cotton swab dipped in nail polish remover.
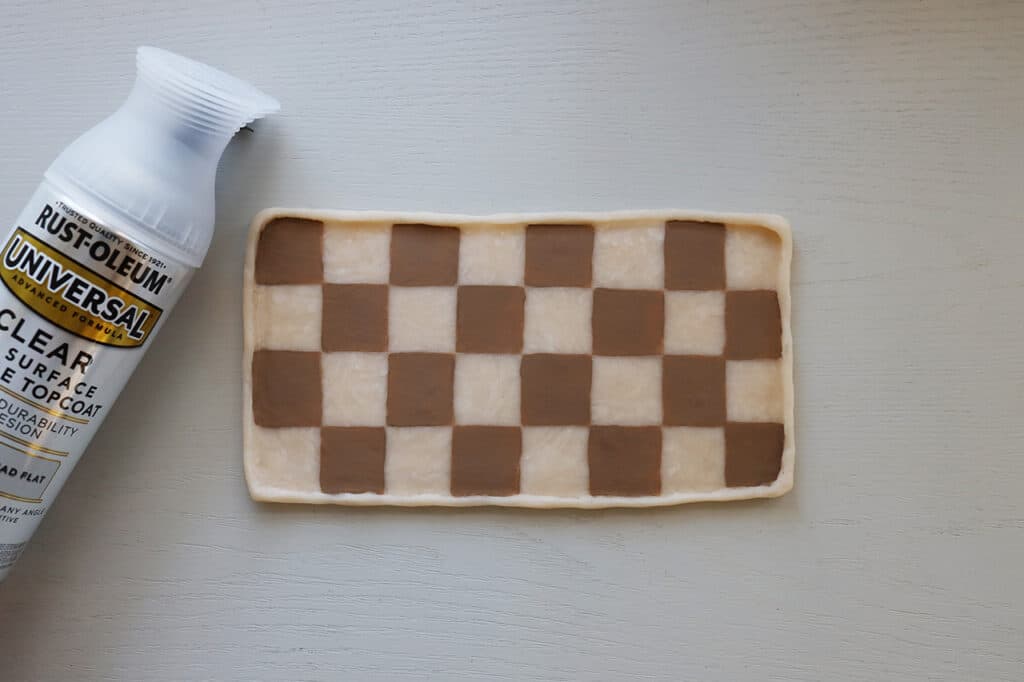
Step
8
Let the second coat of paint dry, and then spray a clear topcoat over the entire tray to protect the paint.
Step
9
Once the topcoat has dried for about an hour, you can style up your new tray!
*If you purchase something using one of the links in this article, we may earn a commission (at no cost to you). Rest assured we only recommend products we’ve vetted and loved.
More Stories...

The space is decked out in Semihandmade Moss Quarterline and Tahoe.

House flippers and mom-daughter duo Lacey and Audrey Soslow created the kitchen of their (buyers’) dreams.

Malene Barnett teamed up with designer Leyden Lewis to create a space representative of her work.