For designers and DIY newbies alike, Semihandmade’s accessible, easy-to-install cabinet fronts have become the secret sauce for many kitchen renovations over the past decade.
Over the years, customers have found plenty of inspiration, and sometimes, that inspiration is worth revisiting. That’s what brings us to Sarah Sherman Samuel’s Venice bungalow kitchen, which she designed in 2013. Samuel’s kitchen—with its serene, sophisticated design—helped put Semihandmade on the map, just two years after its launch. Since then, the designer has frequently used Semihandmade fronts in client projects and her more recent kitchen in her new Michigan home. In 2018, we even teamed up with her to launch a collection of modern beadboard fronts in a range of versatile, contemporary hues, and later will month we will be releasing paintable DIY version.
But for now, let’s go back to where it all started: A once-cramped Venice, California, kitchen that Samuel transformed into a bright and airy retreat. For this project, the designer was drawn to Semihandmade’s DIY Shaker fronts for a wholly practical reason. “We were on a tight budget,” she says. “Being able to do it all ourselves while still getting that custom kitchen look was what really drew us to them.”
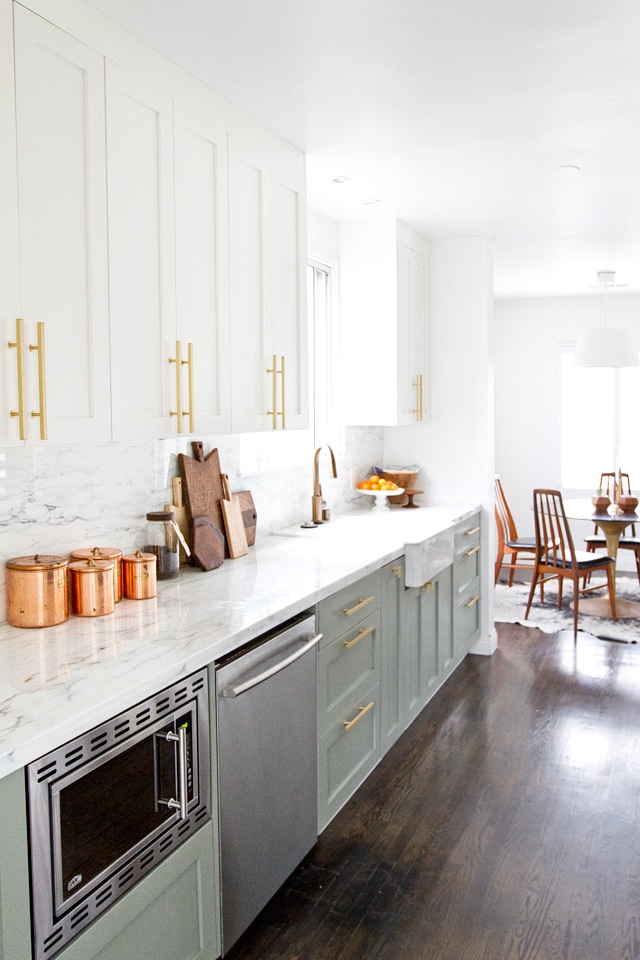
By saving money on cabinetry, Samuel was able to invest in elements that helped reinforce the kitchen’s liveable luxury feel, like Calacatta marble countertops sourced from a slab yard and a .
There’s a subtle touch of New York flair in the designer’s California kitchen, too: the space was inspired by a photo of the Tribeca restaurant, Tiny’s, taken by her friend, photographer Jessie Webster. “I based the whole color palette and feel off of it,” Samuel says.
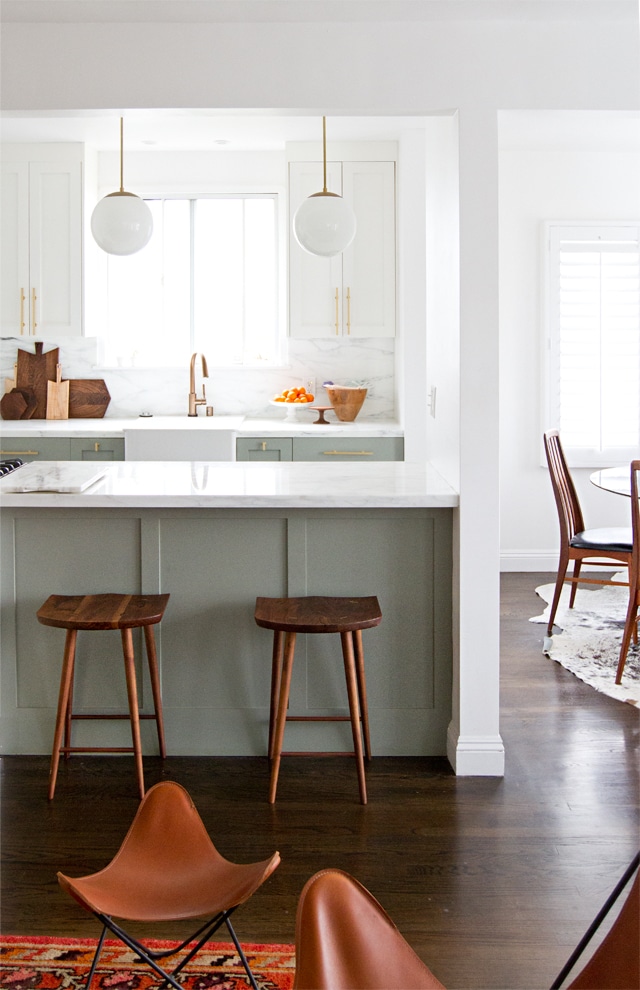
That’s where the dual-toned cabinets came in. But nailing the soft, green-grey hue of the restaurant’s exterior took some trial and error to land on . “It wasn’t my first pick,” the designer says. “I painted five different shades of green and charcoal on poster board, but when I got them in the space, that one was the clear winner.” Dark wood floors (stained with ) deepen the green-gray lower cabinets’ visual impact.
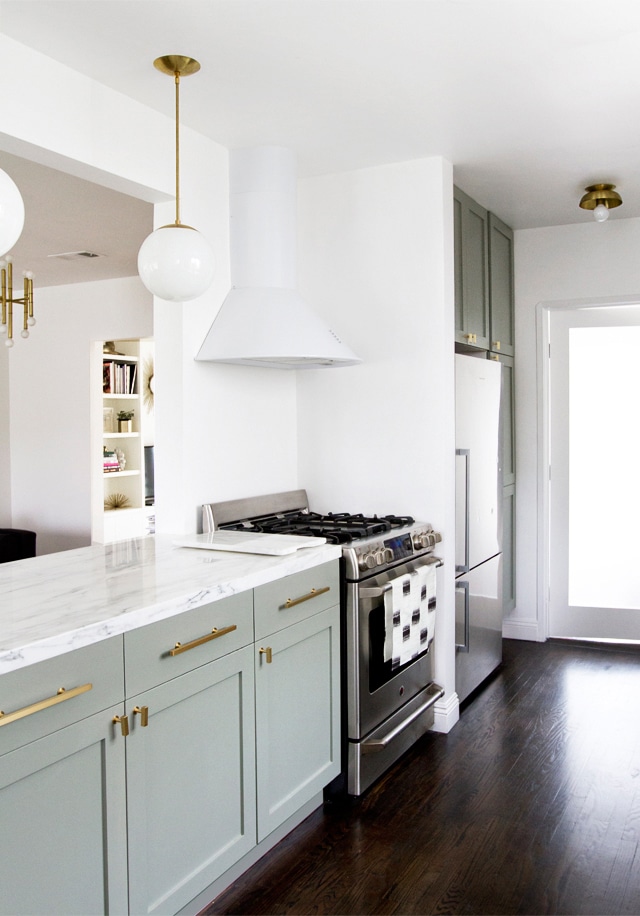
Initially, Samuel hired a professional to spray paint the Semihandmade DIY Slab cabinet fronts, but when she decided to extend the kitchen halfway through the renovation, she finished the job herself with a (which costs less than $100 and results in a smooth, streak-free application, for any ambitious DIYers out there).
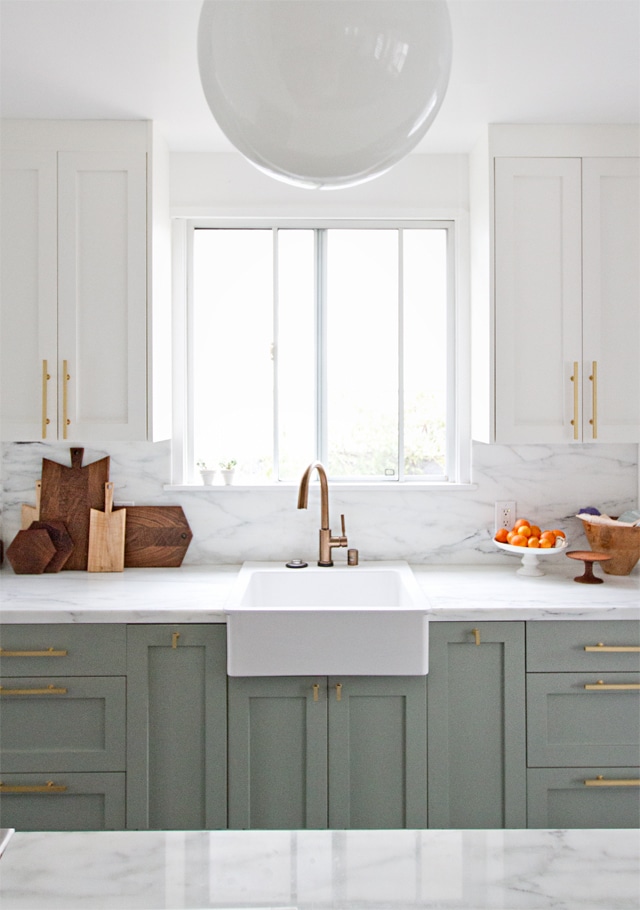
As with all of Samuel’s projects, the beauty is in the details. Here, from MyKnobs.com lend an elevated touch to the classic Shaker cabinet fronts, and Cedar & Moss make for the ideal kitchen island lighting. By cleverly building a microwave into the lower cabinetry instead of the upper, Samuel eliminated the chance for any visual clutter to accumulate. Instead, her beloved collection of cutting boards and some copper get the countertop showcase they deserve.
All in all, it’s a timeless design—one that we’ll undoubtably turn to again and again in the years to come.
*If you purchase something using one of the links in this article, we may earn a commission (at no cost to you). Rest assured we only recommend products we’ve vetted and loved.
More Stories...

The space is decked out in Semihandmade Moss Quarterline and Tahoe.

House flippers and mom-daughter duo Lacey and Audrey Soslow created the kitchen of their (buyers’) dreams.

Malene Barnett teamed up with designer Leyden Lewis to create a space representative of her work.