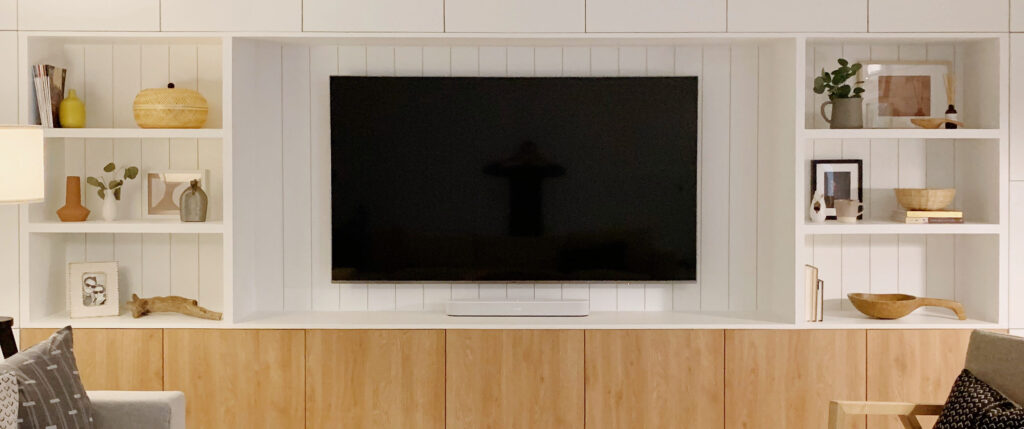
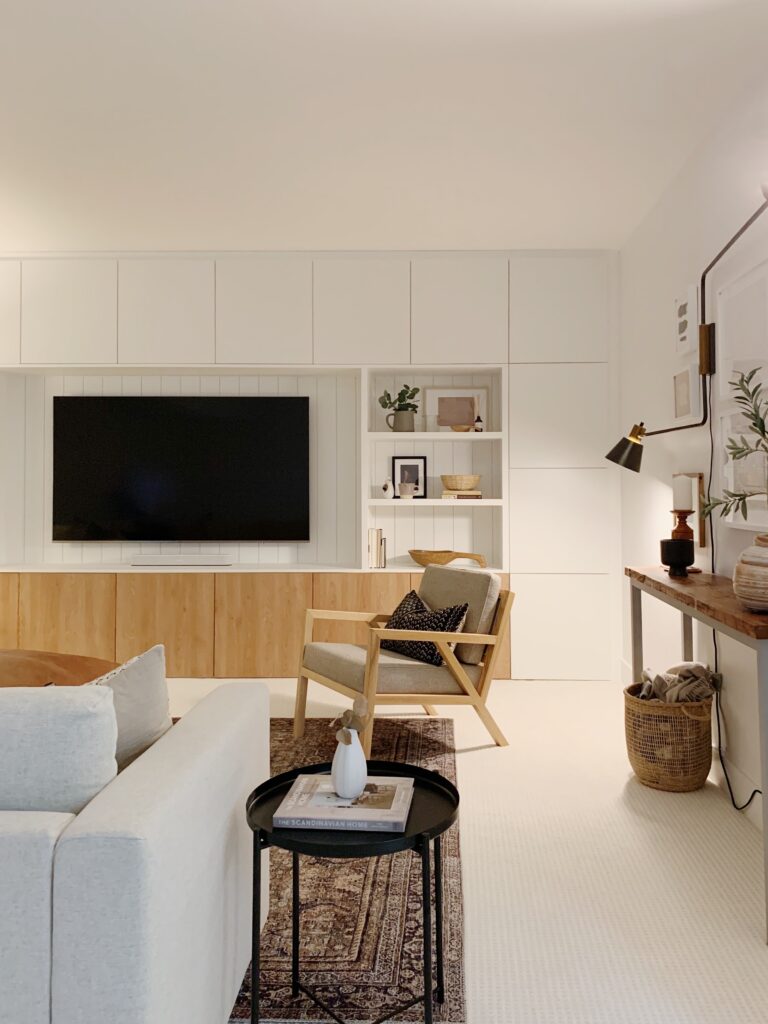
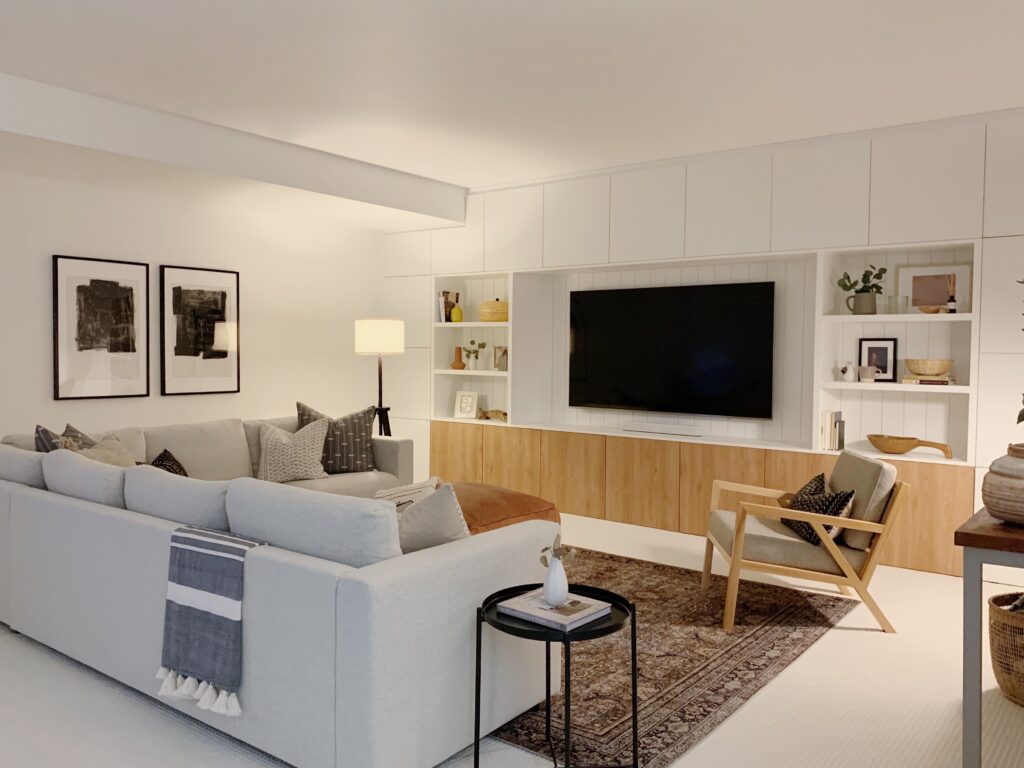
Tyler and Kelsey Johnston didn’t even consider calling in the pros when faced with designing a massive floor-to-ceiling media cabinet for their brand-new basement.
“We love to tackle home projects ourselves,” says Kelsey. The couple’s modern Indiana farmhouse is filled with plenty of ingenious DIY projects like this, but you’d never guess. The former engineer turned full-time design blogger has a talent for making budget finds look professional-grade, from her IKEA guest bathroom and Semihandmade kitchen to her DIY office lamp and custom laundry nook.
True to form, the pair designed, constructed, installed, and styled the floor-to-ceiling media unit themselves. “We spent around $3,000 on the project, whereas a custom solution would’ve probably cost $5,000 to $10,000 or more,” she explains. “We were trying to get as much storage as possible at an affordable price point.”
Finished with trim, custom open shelving, and texture-rich wall paneling, the built-in is a design feature of the basement and looks much more expensive than it actually is. If you’d like to follow in the Johnstons’ footsteps, find their nine-step media cabinet DIY below.
Disclaimer: Not all DIY projects are made equal and this one is on the advanced side, so don’t hesitate to consult your general contractor or handiest friend before getting started.
Steps
Step
1
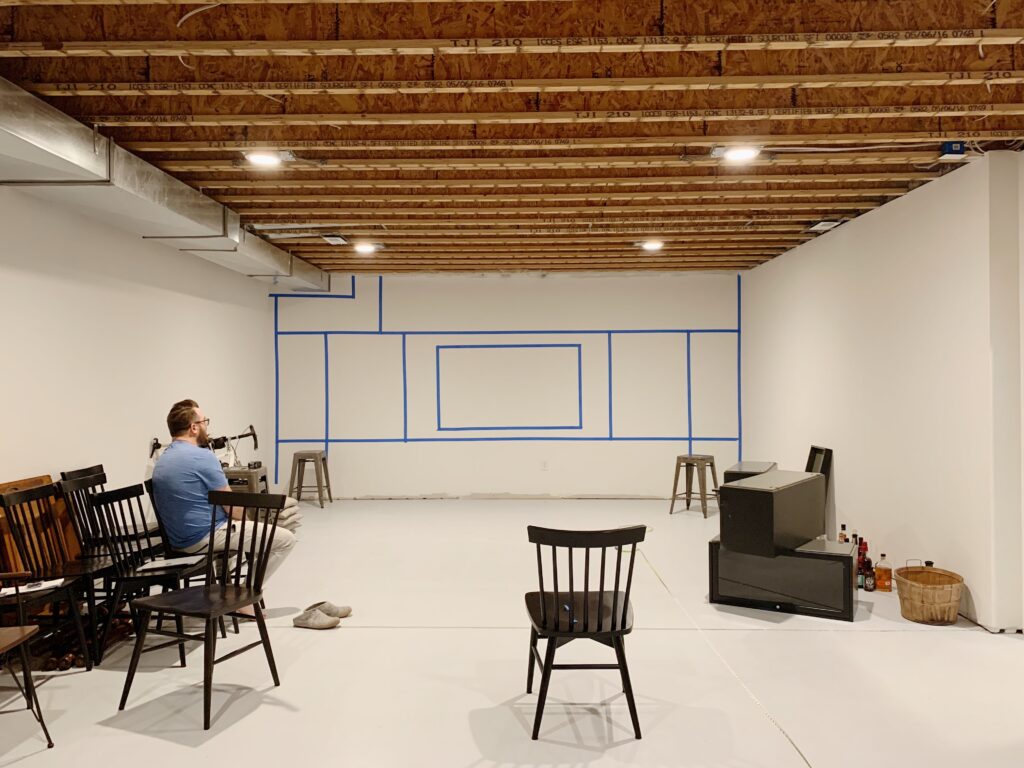
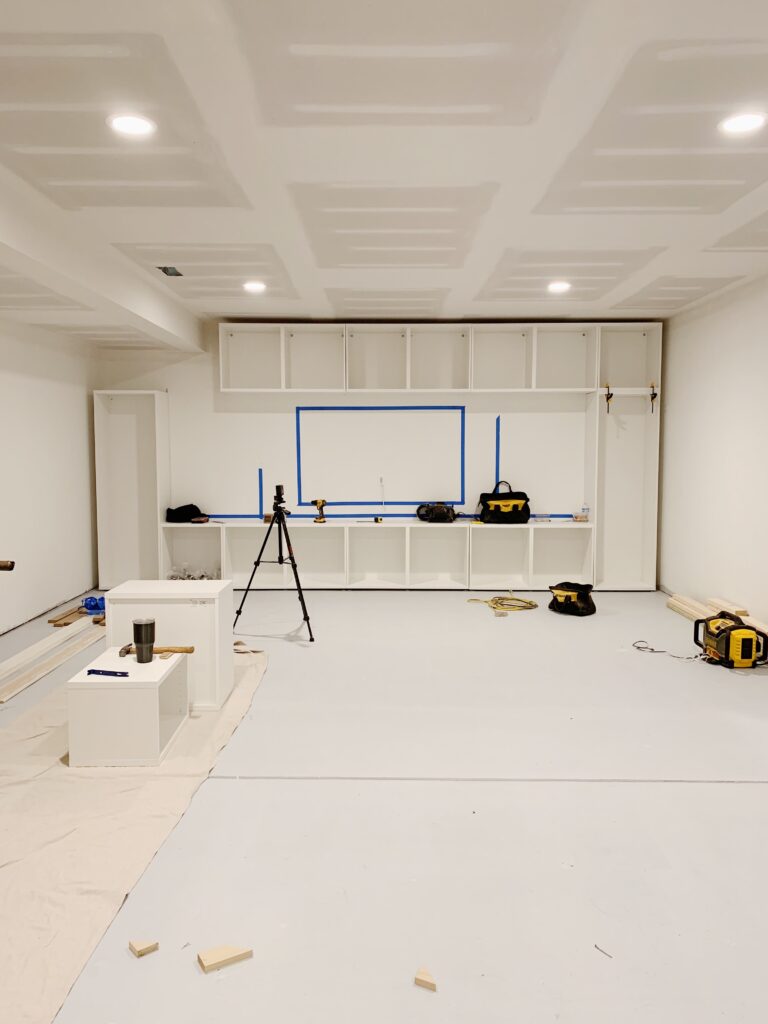
Map out a plan to maximize your space. We used inexpensive painter’s tape to visualize, but you could also use Photoshop or paper and pencil.
Step
2
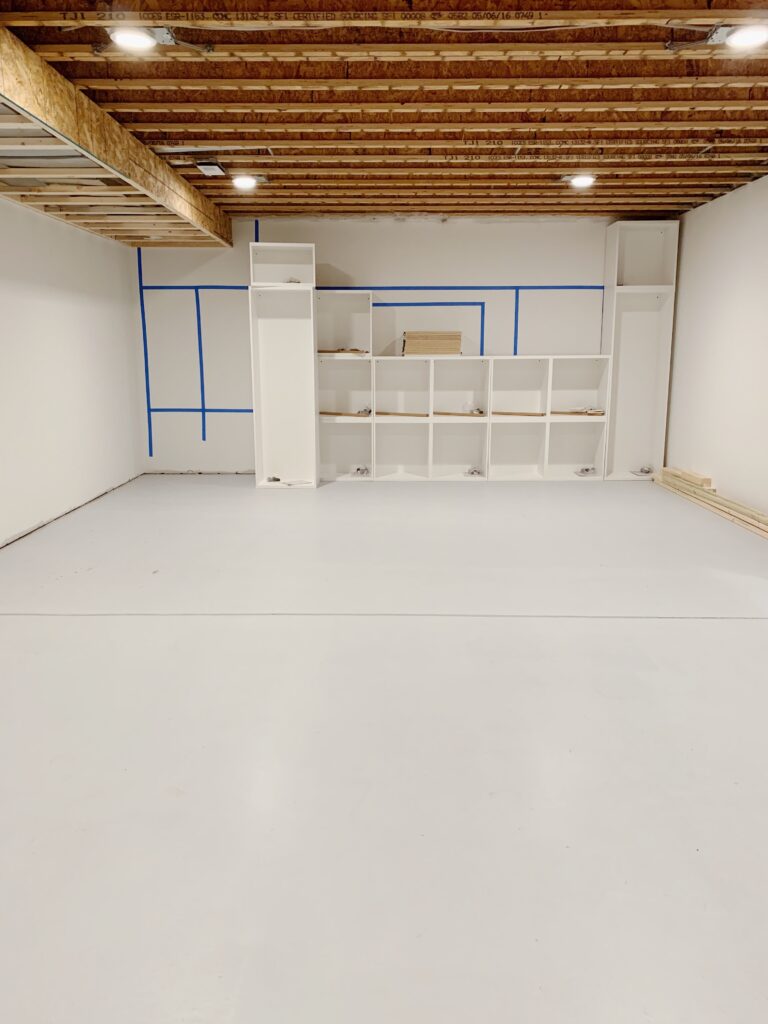
Assemble the IKEA BESTA media units according to the IKEA instructions.
Step
3
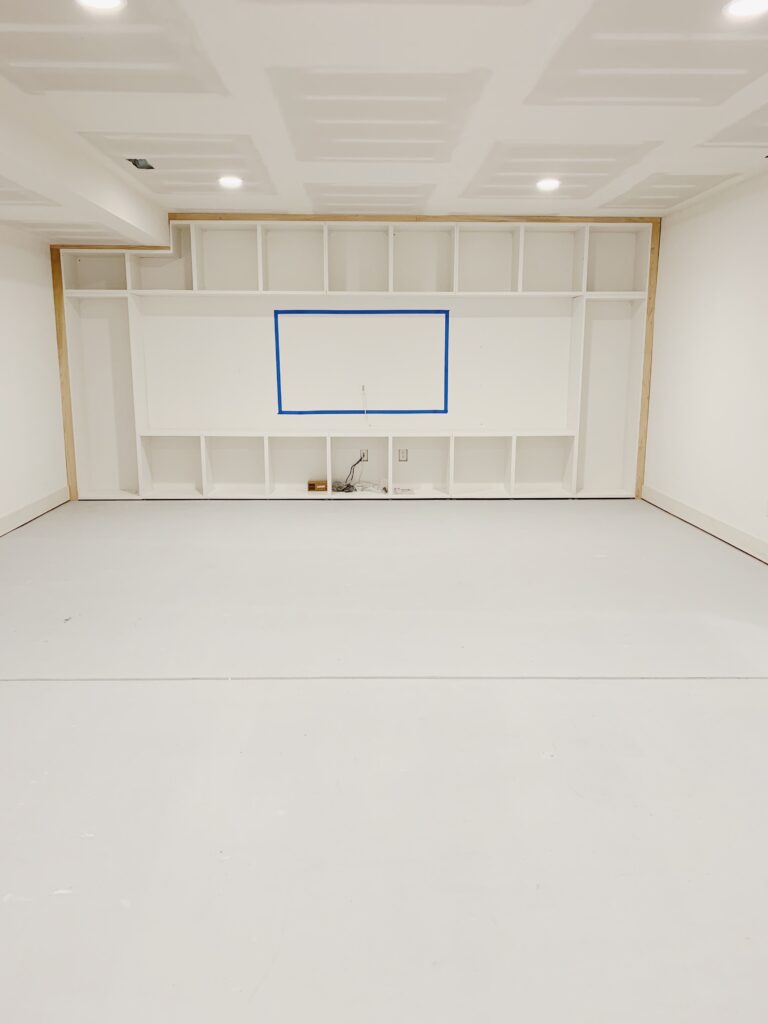
Attach suspension rails to the wall and mount the BESTA units following IKEA instructions.
Step
4
Add trim to the top and sides of cabinets to look flush with the walls and ceiling. You may also need to add trim at the floor level, but we installed carpet and didn’t need to do so. This gives it a more finished, custom look.
Step
5
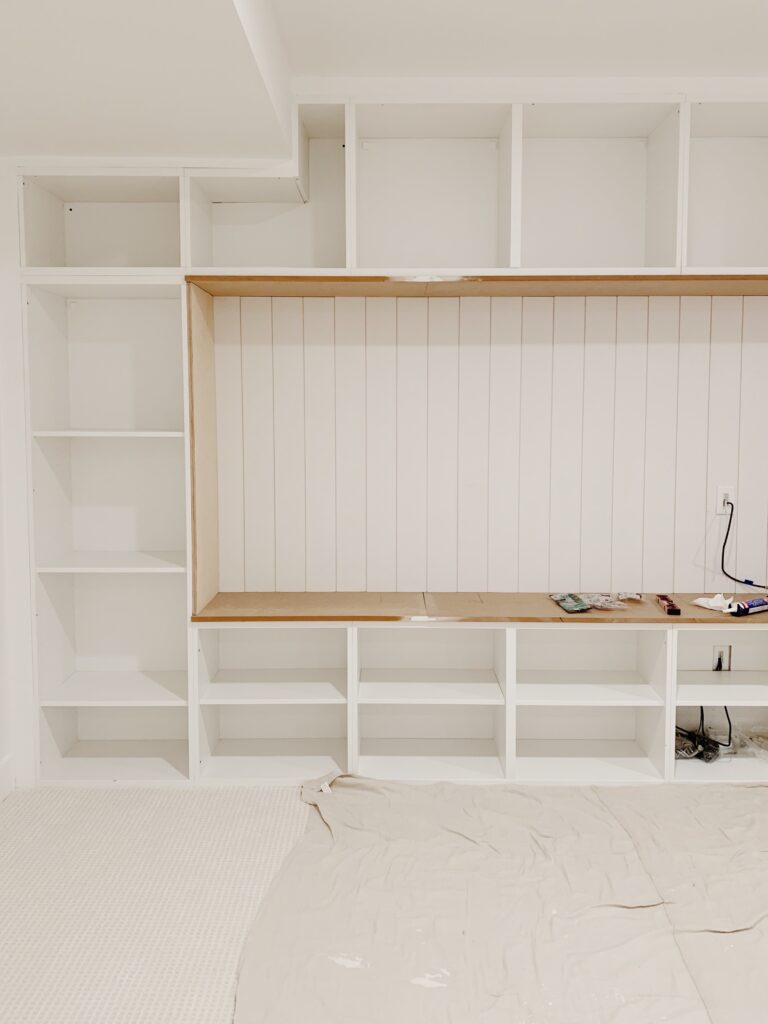
Attach MDF panels to the top and bottom of the interior cavity.

Step
6
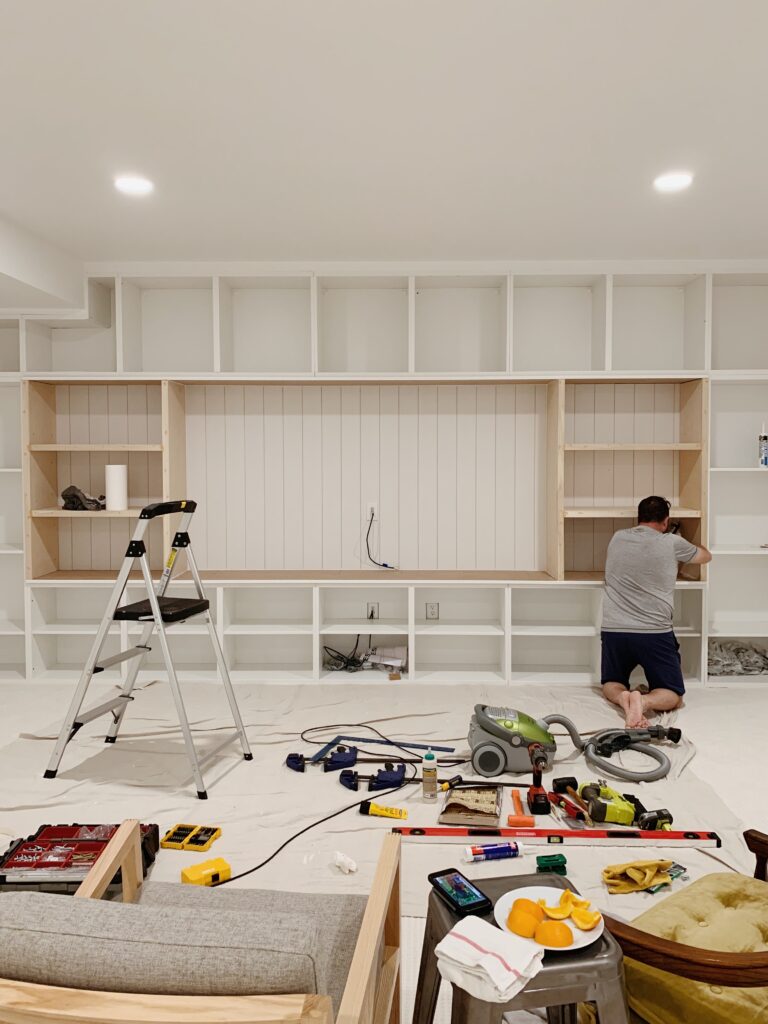
Attach tongue and groove paneling to the back wall using construction adhesive. This is optional but adds great visual interest to the space.
Step
7
Use plywood to build open shelves on each side.

Step
8
Caulk all seams and paint.
Step
9
Attach the hinges to the doors. Semihandmade doors come pre-drilled to fit IKEA hinges. Hang the doors and level as needed. Enjoy!
More Stories...

The space is decked out in Semihandmade Moss Quarterline and Tahoe.

House flippers and mom-daughter duo Lacey and Audrey Soslow created the kitchen of their (buyers’) dreams.

Malene Barnett teamed up with designer Leyden Lewis to create a space representative of her work.
Comments (1)
DId you take out your overhead lights in the end?