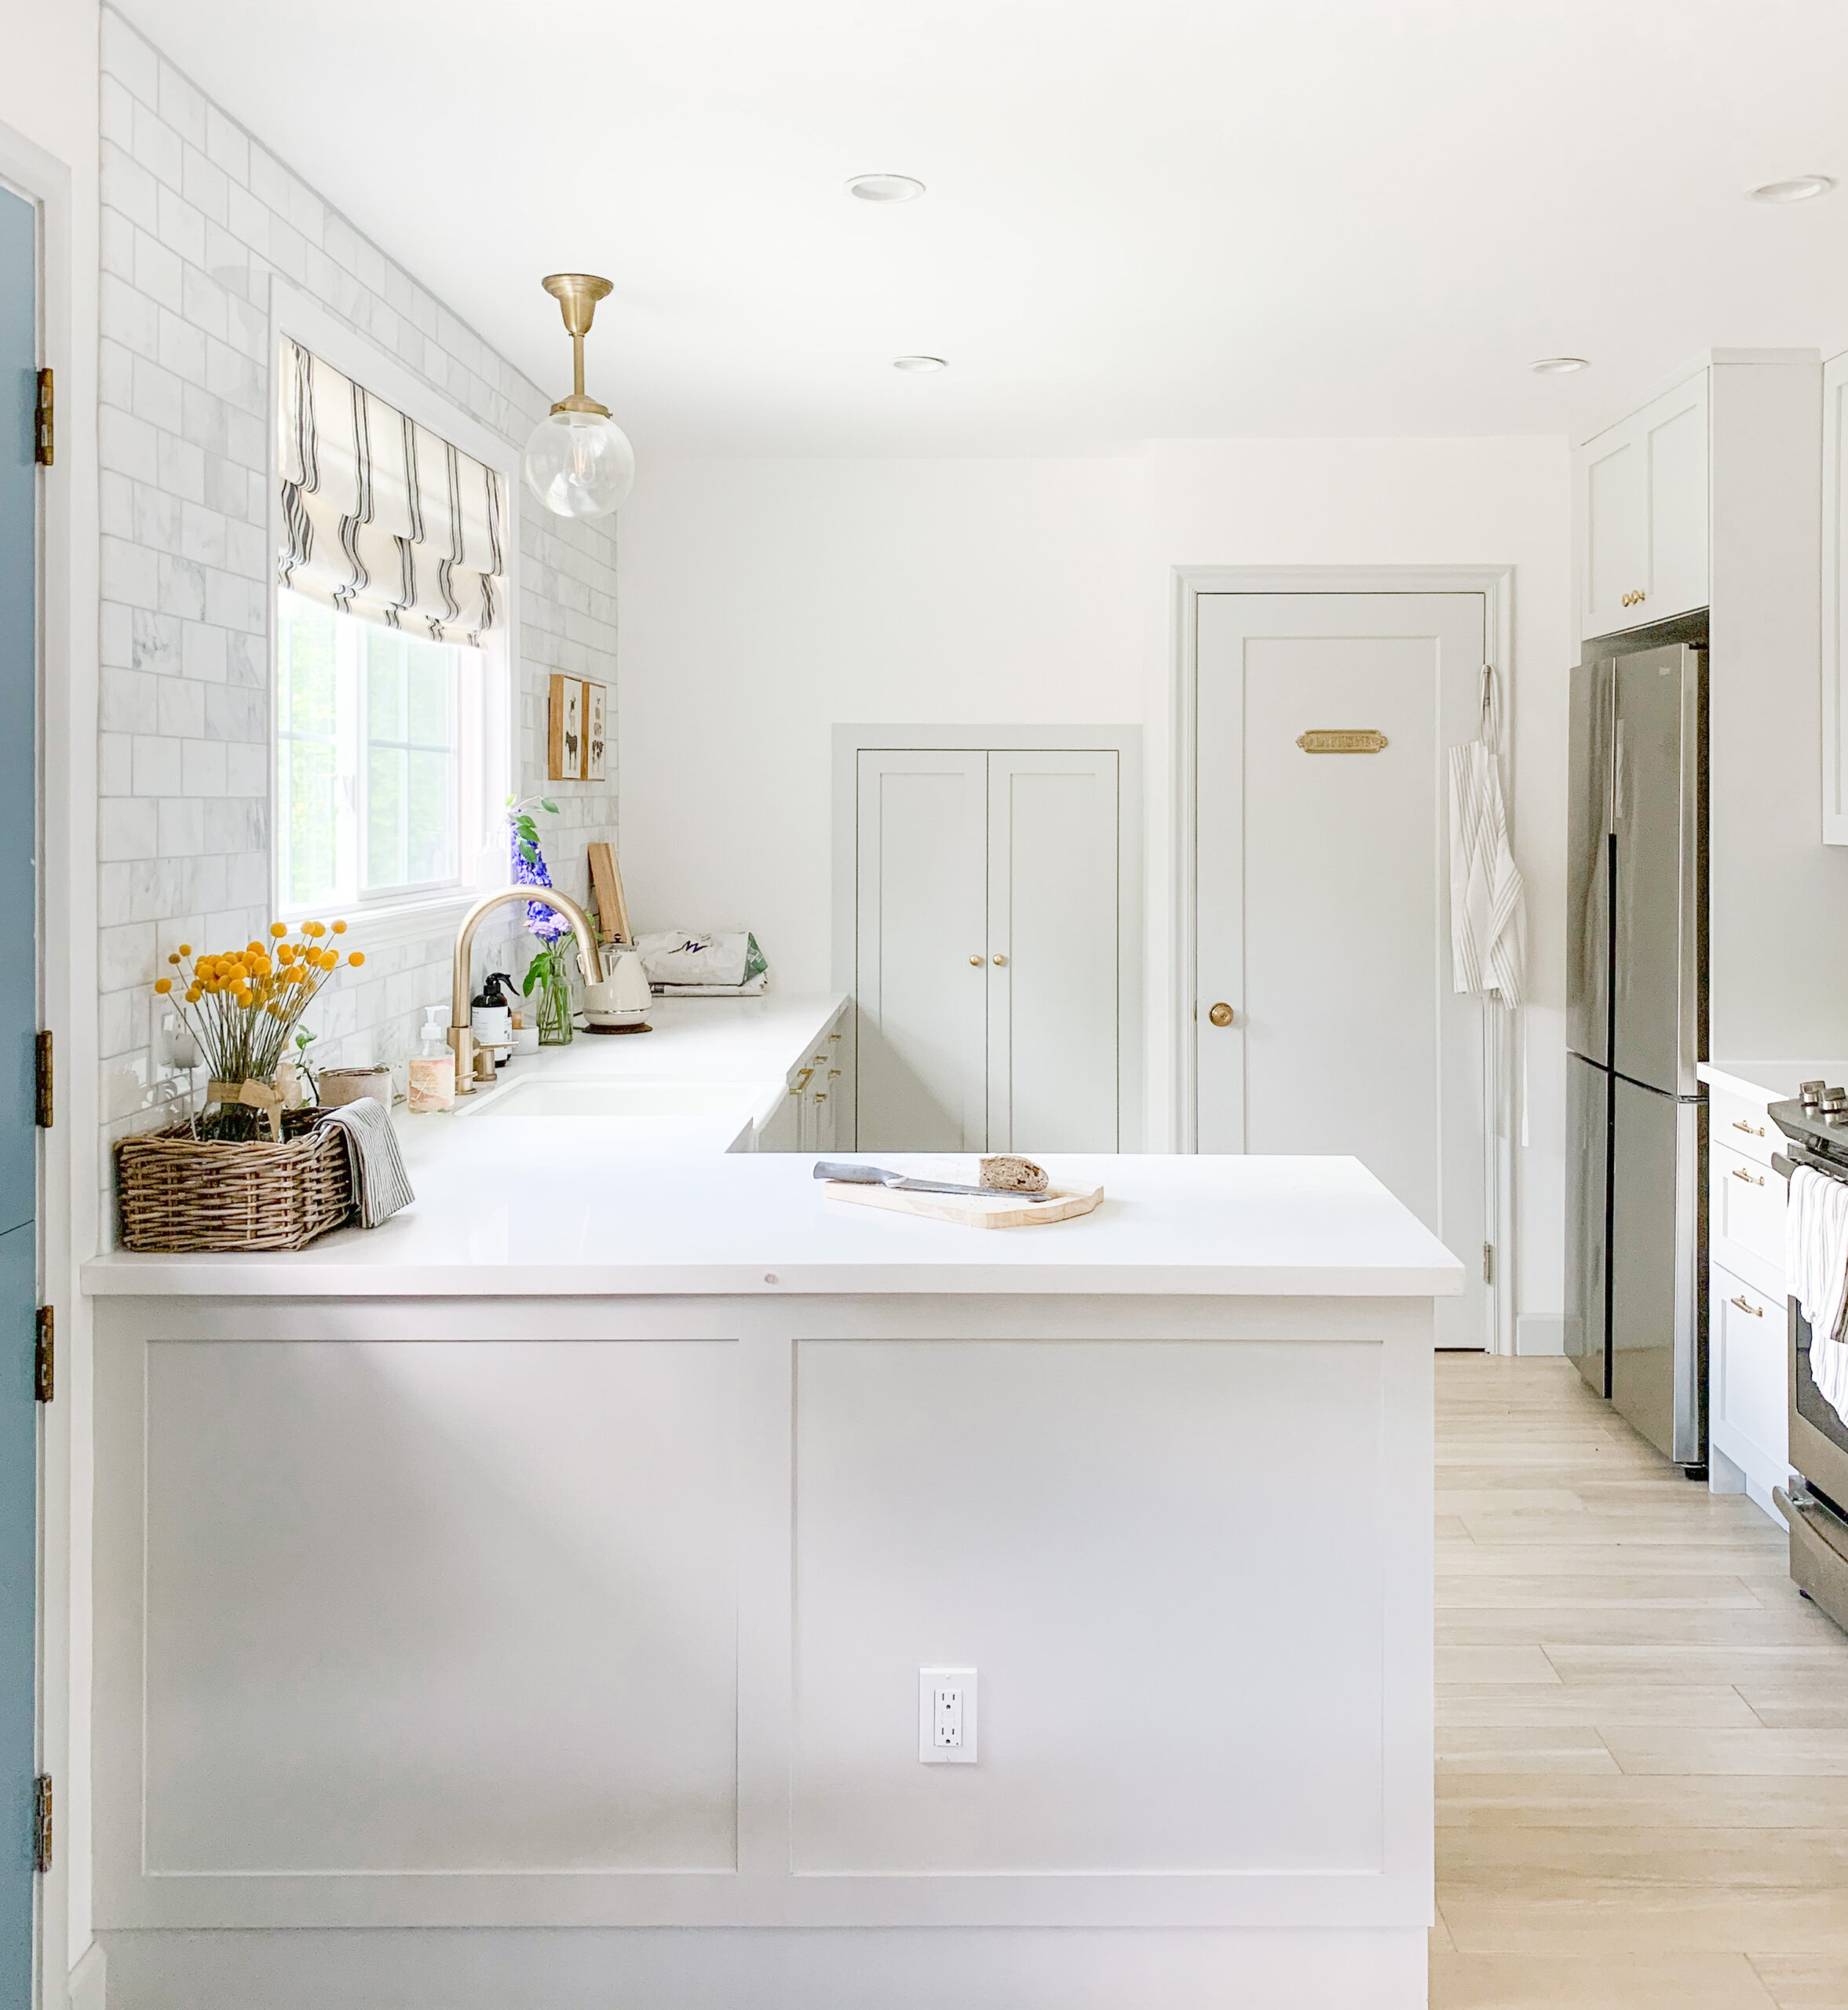
For blogger Kelin Zhao, revitalizing her 100-square-foot Sunnyvale, California, kitchen took intensive planning.
Built in the 1940s or 1950s, it felt dated and claustrophobic, plus it had a dysfunctional layout. “Our house is really small so we wanted the kitchen to feel impactful and look more open,” she says. Zhao, who runs the blog, Hydrangea Treehouse, has always been keen on DIY, arts and crafts, and making her own garments. The blog, which began as a hobby, has now become a place where she can show off her renovation projects.
While undertaking a kitchen remodel earlier this year, Zhao and her husband found that using IKEA kitchen cabinets was the most cost-effective option. By using DIY Shaker Semihandmade fronts, they were able to give their space a custom look. “I really liked the thickness of the shaker doors,” she says. “They aren’t too wide or thin and work really well in small spaces.”
Zhao opted for three coats of Benjamin Moore’s Gray Owl, a neutral gray that was fairly easy to paint right onto the cabinetry, first using a spray paint gun and then a brush and roller, which worked equally well. But the real genius in Zhao’s design is in organizing every last inch to maximize each cupboard and drawer:
Plan By Zones
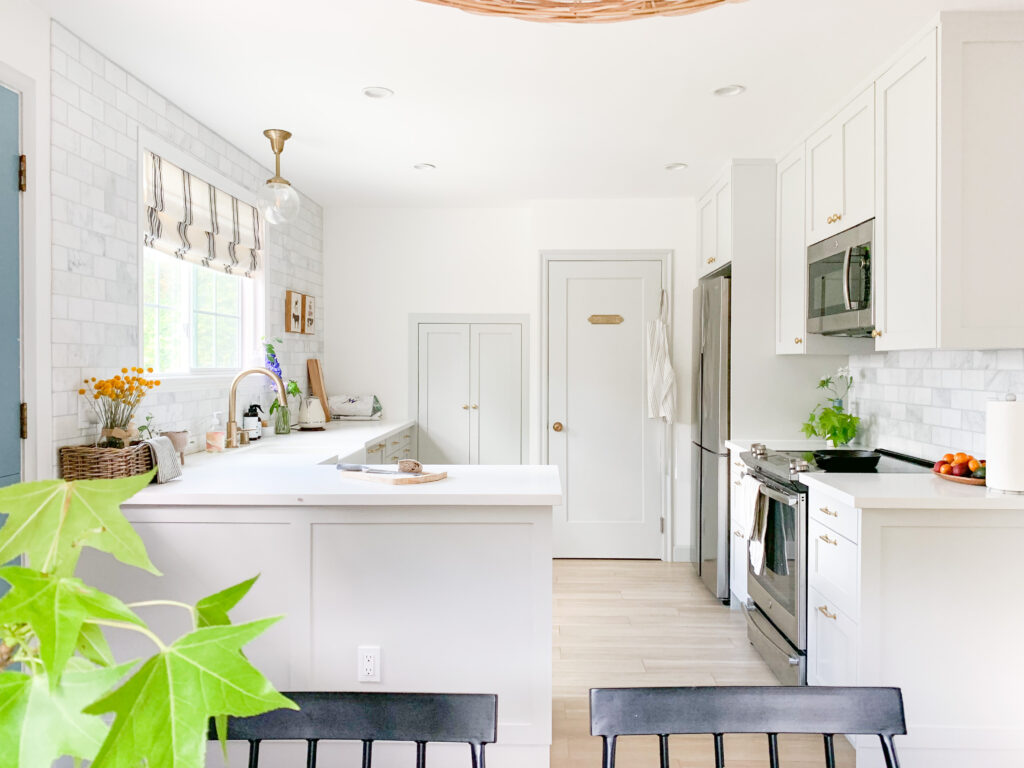
This is by far Zhao’s most critical piece of advice for homeowners. “When laying out your kitchen cabinets, make sure you know what will go in each area,” she says. Zhao went for seven lower cabinets, including one for pull-out trash bins, and four upper cabinets, and divided her kitchen into cleaning, prepping, cooking, storing and trash zones using IKEA’s Home Planner tool. The zones line up with their respective appliances (baking essentials near the oven, cleaning items by the sink, and cutting boards near the prep station).
Maximize Your Drawers

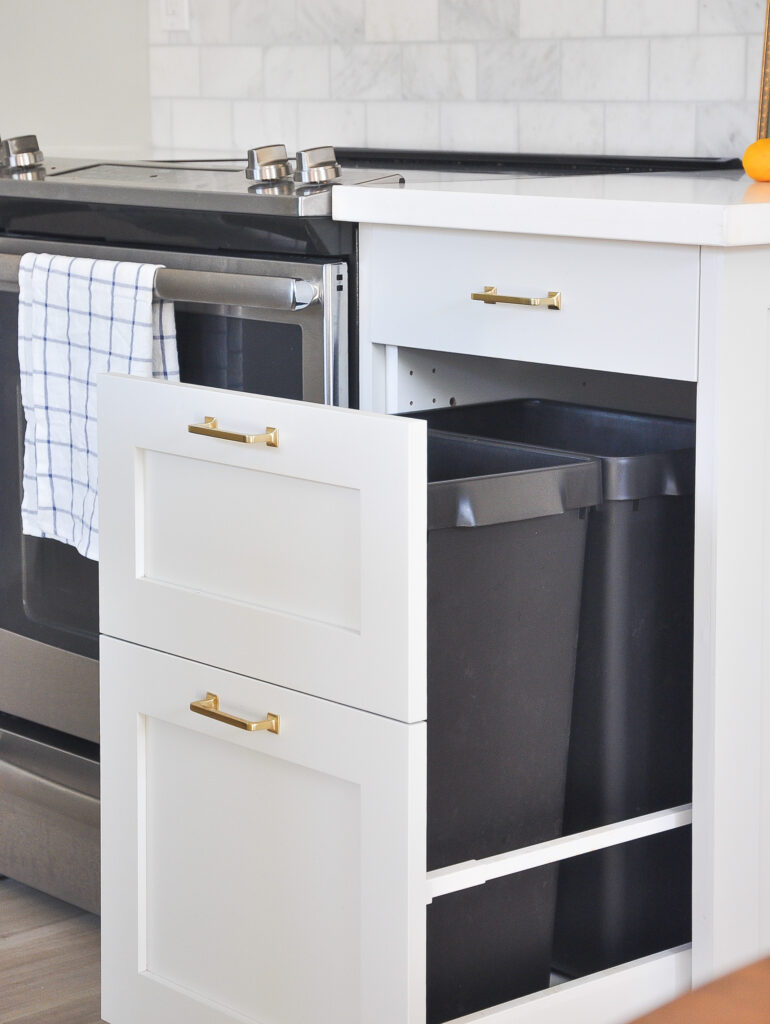
In addition to creating zones within her kitchen, maxing out drawer space was key. She chose various organizers like Variera shelf inserts, trash can, and cutting board organizer. The IKEA Sektion System, with its nested drawers, was another great find for making medium and large drawers more efficient.
If it Doesn’t Exist, DIY It
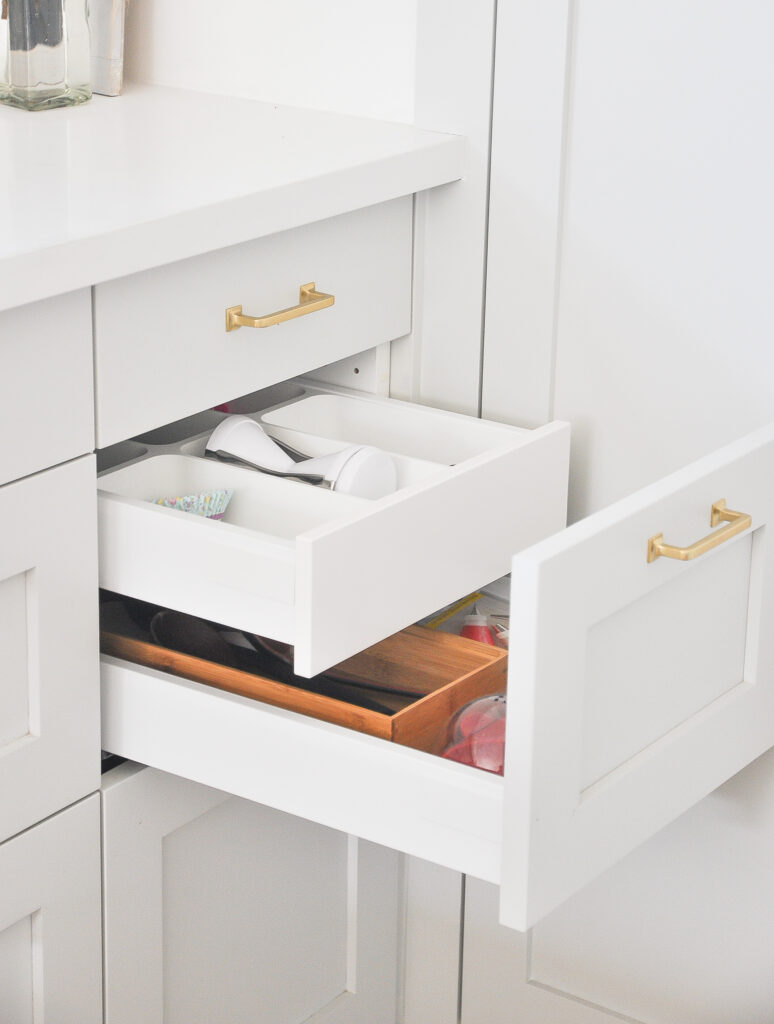
While Zhao purchased tons of organizing tools directly from IKEA, she had some fun when it came to her spice rack and DIYed a simple in-drawer system using two thicknesses of plywood.
Think Twice About Appliances
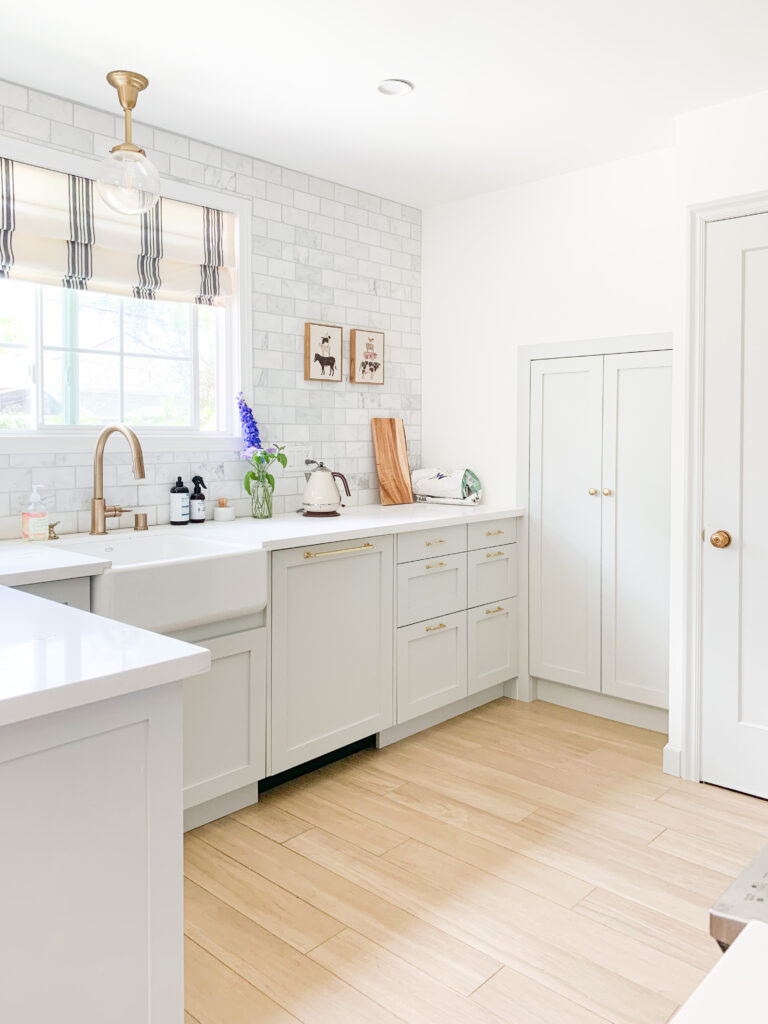
In a small kitchen, every decision counts. Zhao opted for a counter-depth refrigerator which takes up less space and blends more easily without sticking out into the walkway. Instead of splurging on a hood, she picked a convection microwave with a vent that plays double-duty above the stove, and chose a 30-inch range with a pull-out drawer that adds further storage for pans and cupcake tins. At only 100 square feet, she maximized the space through smart planning and clever storage, something anyone can do.
Want more? Visit Zhao’s blog, Hydrangea Treehouse, for additional details on her organizing journey.
More Stories...

The space is decked out in Semihandmade Moss Quarterline and Tahoe.

House flippers and mom-daughter duo Lacey and Audrey Soslow created the kitchen of their (buyers’) dreams.

Malene Barnett teamed up with designer Leyden Lewis to create a space representative of her work.
Comments (13)
Is that a Semihandmade option to expose the drawer above the trash can pull-out and make the pull-out portion shorter? At Ikea, I have only seen the option to have the pull-out full-height (up to countertop) and have the drawer concealed within. I much prefer this option I see here!
I’m not sure it’s a great idea to have anything else but trash in a trash cabinet. At one point I had my silverware in a drawer above the trash pullout, but then I realized it’s kind of unhygienic.
I have my trash cans in my kitchen with the drawer above for utensils. The contractor who installed my IKEA kitchen created the pull-out and side rails with other available IKEA hardware and materials. As I recall, it didn’t involve cutting down or otherwise hacking the parts.
My utensil drawer is directly above the trash and there is nothing ‘unhygienic’ about it. Consider what you throw in your kitchen trash (potato peelings, cardboard or plastic from purchased food, etc.) It’s all ‘clean waste’. Unless you throw dirty diapers in your kitchen trash there is no issue with kitchen waste being near your dishes or utensils. Just take the trash out regularly.
Keylly. This is what we are doing with our trash drawer. I would pair it with their electric opener so you don’t have use your hand to pull out the trash by hand. The trash cabinet comes in two sizes and here’s the link: https://www.ikea.com/us/en/p/sektion-maximera-base-cab-f-recycling-3-fronts-white-axstad-matte-blue-s09402663/
This is beautiful! What are the wall tiles?
Hi Kelly, it sounds like the trash can pull-out was an IKEA hack by Kelin. She details it in her post here: https://hydrangeatreehouse.com/ikea-kitchen-organization/
“Ikea doesn’t have any official kitchen trash cabinet, but you can easily use a tall drawer and place two of their big trash cans inside. My Ikea trash cabinet uses their 18in base cabinet, with “1 double drawer, 1 drawer” configuration. I was able to fit 2 Ikea 9 gallon trash bins inside the double drawer.” Hope this helps!
Great!
Hi Evelyn, These are the white Carrara marble tiles Kelin used: https://www.thebuilderdepot.com/cama3xsutipolished.html
Hi, where are the drawer pulls from?
Hi Aline, Kelin used these pulls from Rejuvenation: https://www.rejuvenation.com/catalog/collections/mission-drawer-pull
Hope this helps!
This is what we are doing with our trash drawer. I would pair it with their electric opener so you don’t have use your hand to pull out the trash by hand. The trash cabinet comes in two sizes and here’s the link: https://www.ikea.com/us/en/p/sektion-maximera-base-cab-f-recycling-3-fronts-white-axstad-matte-blue-s09402663/
Hi Kelly, I do Kitchen Design at Ikea. For Trash/Recycling, I always show our customers the two different options. The standard option is the 30″ high door, with the low interior drawer. The other option is the 5/10/15 drawer configuration, where the 10″ drawer front is attached to the 15″ drawer front by connecting rails and the low 5″ drawer becomes an exterior drawer. This makes for a stronger door because you are pulling from a lower point, which puts less “torc” on the door. And, this keeps the small drawer separate from the trash/recycling below. FYI, it’s easy to switch your recycling cabinet from the single door to the 5/10/15 configuration. Just get the 5/10/15 drawer fronts and purchase the connecting rails at Ikea Kitchens. One more thing to consider – the 5/10/15 inch trash/recycling cabinet looks best when your drawer cabinets are also in the 5/10/15 inch configuration or in the 15/15 configuration. If your cabinet drawers are 10/10/10, these look best with the single 30″ high trash/recycling door.
Beautiful kitchen! What color doors are these? Matte white?
1 Trackback or Pingback