There’s nothing sweeter than opening up your patio to dust off winter’s layer of dullness and welcome the newness of spring.
Adding fresh foliage can bring a restorative air to your outdoor space. Think of choosing plants as an exercise in creativity, letting your eye guide you to the types of colors, textures, and shapes with which you’d like to surround yourself with in the new season. The same can be said for the types of pots and planters you choose as well.
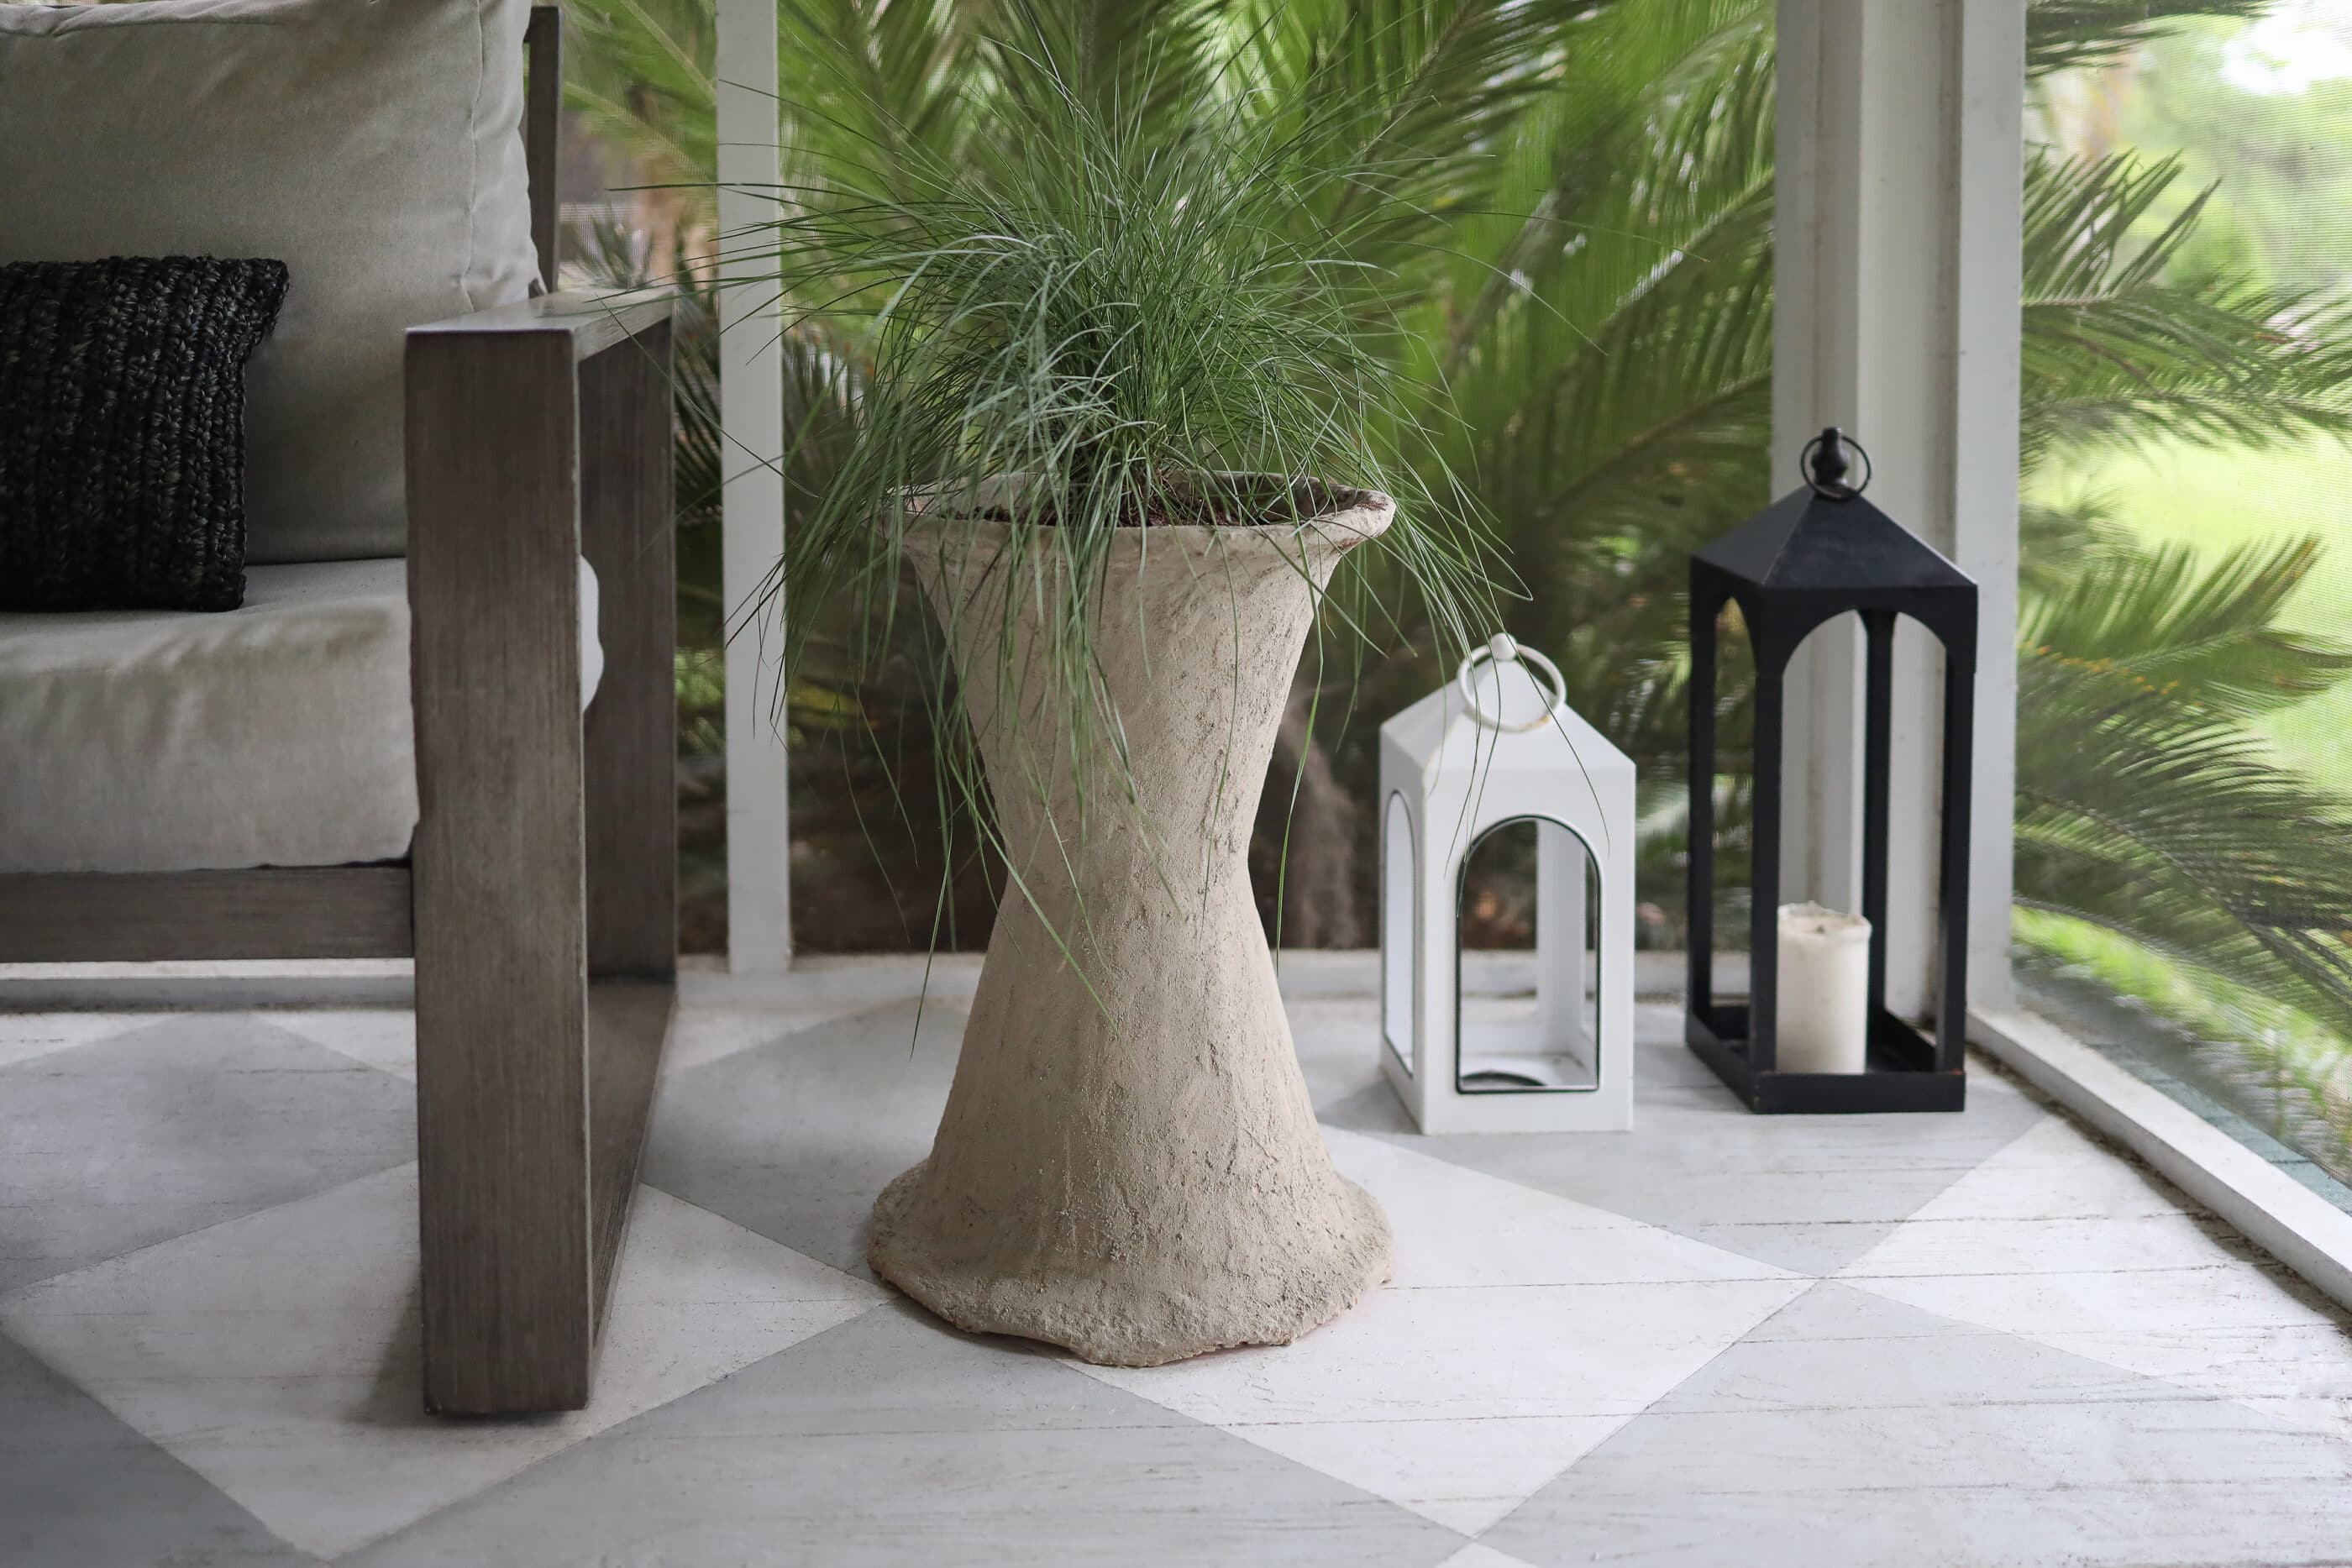
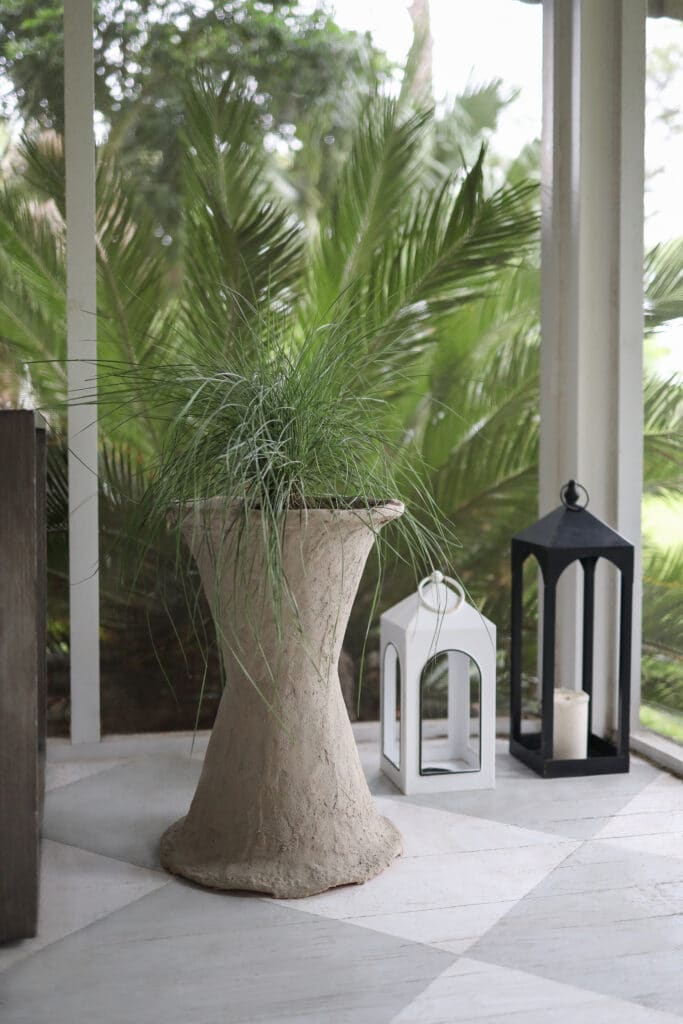
Lately, my eye has been drawn to unique garden vessels with interesting silhouettes—particularly the Diablo hourglass planter by famed Swiss designer Willy Guhl. While an authentic vintage one will set you back a pretty penny, I stacked two planters together and skimcoated them in concrete to get a similar look. Better yet, the statement-making planter costs less than $40.
Steps
Step
1
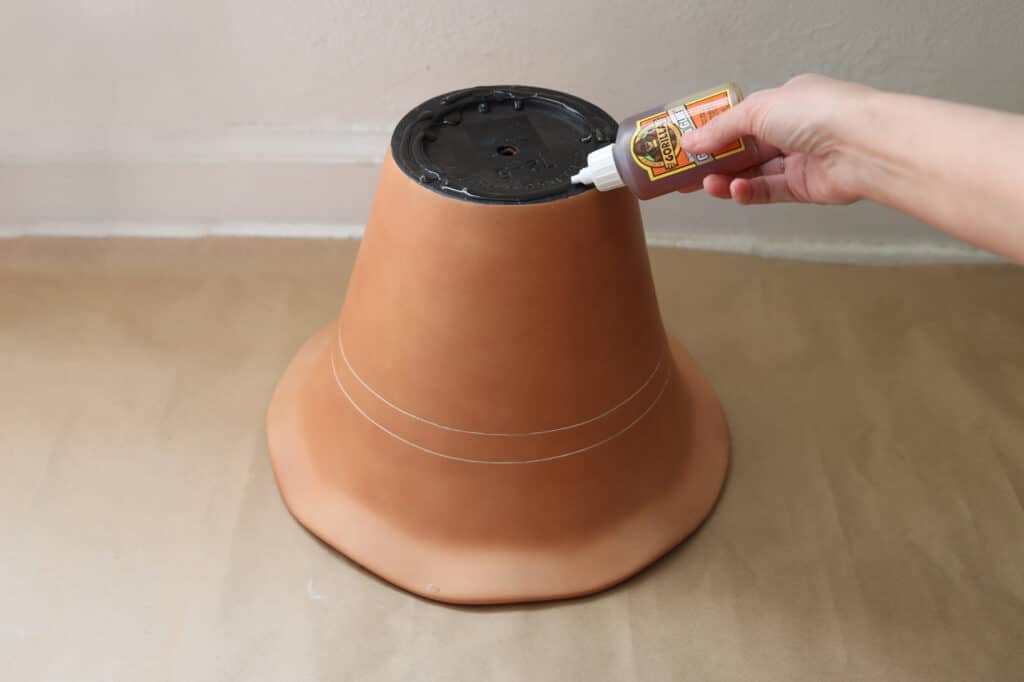
Turn the first planter upside down, and pipe a generous amount of glue around the outer rim.
Step
2
Stack the second planter right-side up on top of the first planter, and press them firmly together. Be sure to line up the drainage holes, so water can run out once you put your plant inside. Wipe away any excess glue that may run down the sides, and then let the glue dry for an hour or two.

Step
3
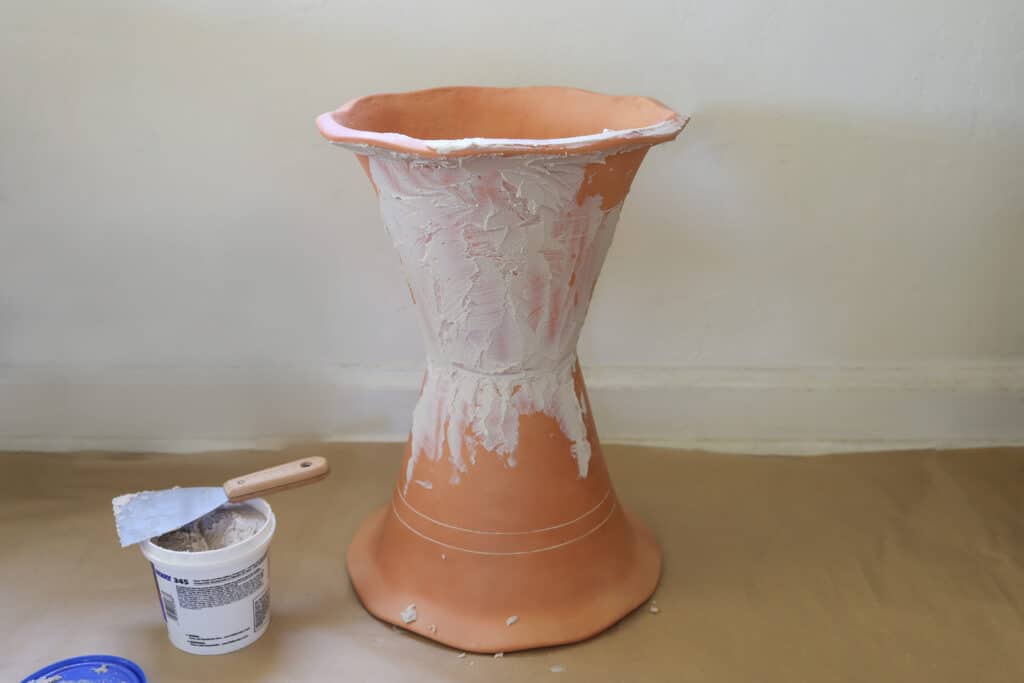
Once the glue has dried, use a putty knife to apply a thin layer of concrete patch over the entire surface of the planter. It doesn’t have to be perfectly even—you just want to get a good base coat. Let it dry overnight.
Step
4
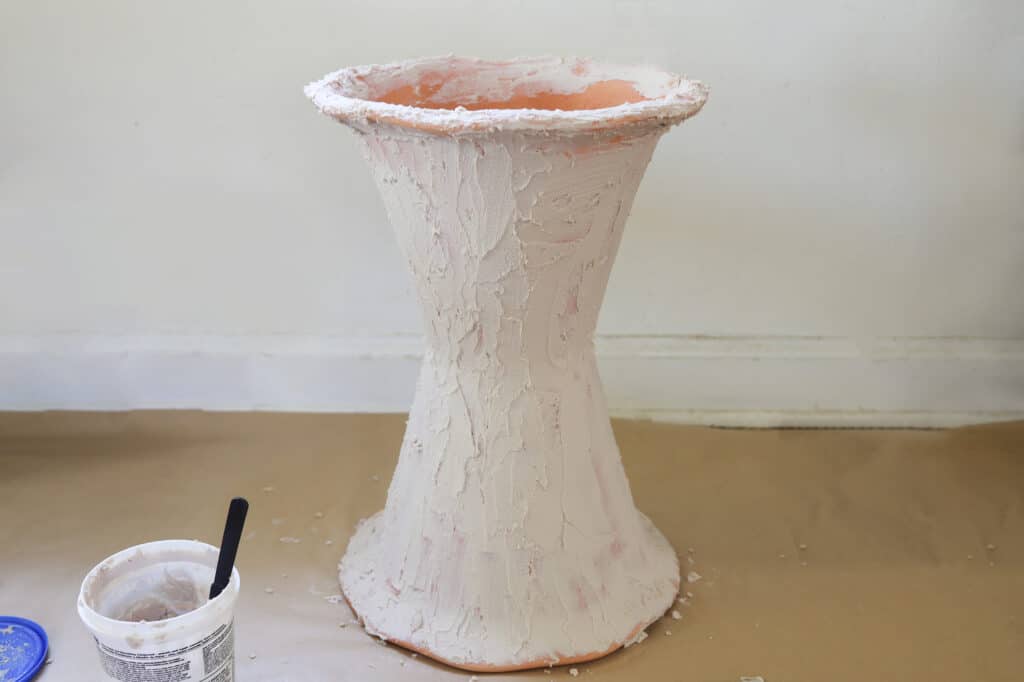
Once the first coat has dried, apply a second coat of concrete patch. Make sure to fill any gaps from the first coat, and also don’t forget to apply it around the inside rim of the planter. Don’t worry if it looks more like frosting than smooth concrete at this stage. Let the second coat dry overnight.
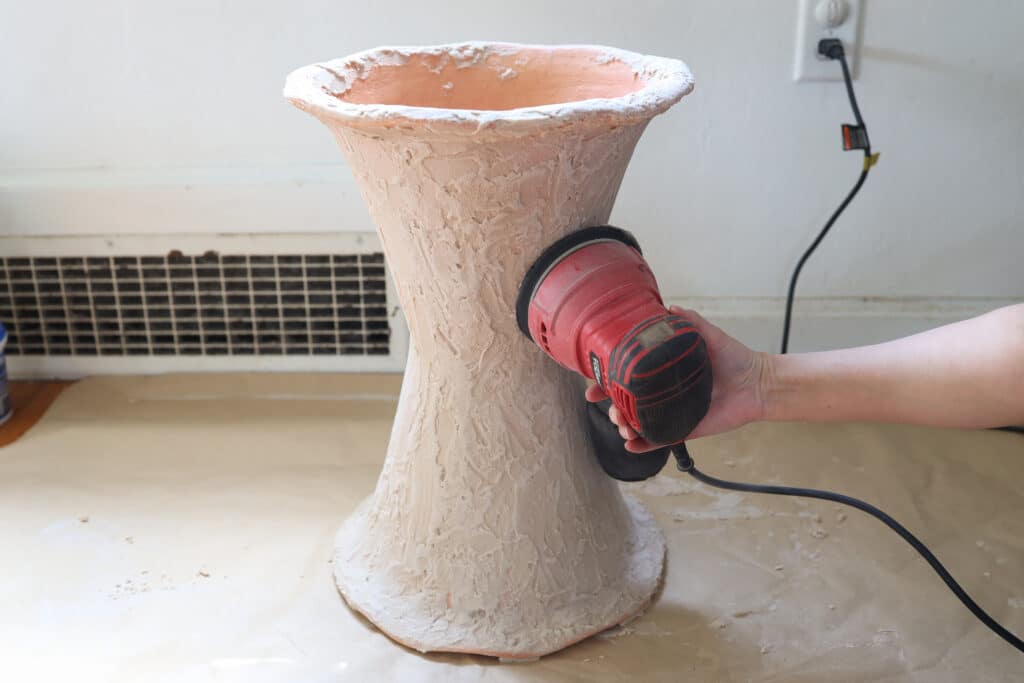
Step
5
Once the second coat is dry, put on a respirator mask and use a power sander with a coarse-grit pad to smooth out the surface of the concrete. It’ll still look patchy after sanding, but the surface should feel smoother. Note: This step produces a lot of sanding dust.
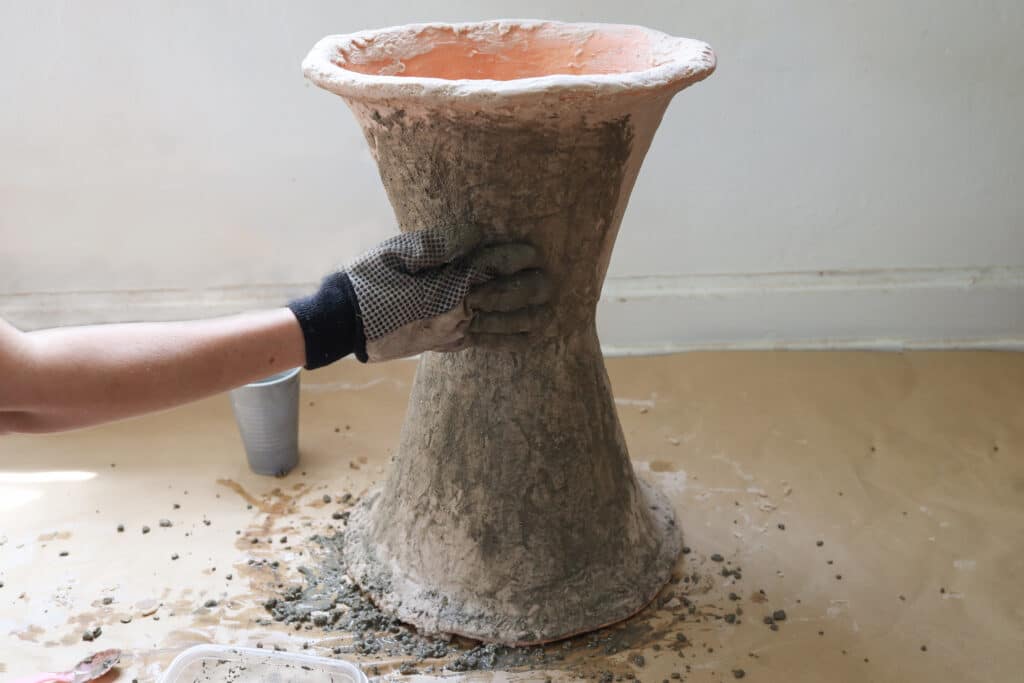
Step
6
After sanding, mix up a 2:1 ratio of fast-setting cement and water inside of a disposable bowl or container. It should look somewhat like watery mud. While wearing gloves, apply the cement mixture to the entire surface of the planter with your hands. Smooth as you go, and fill in any gaps or holes. Aim for a generous coat over the entire planter, and then let dry for a few hours.
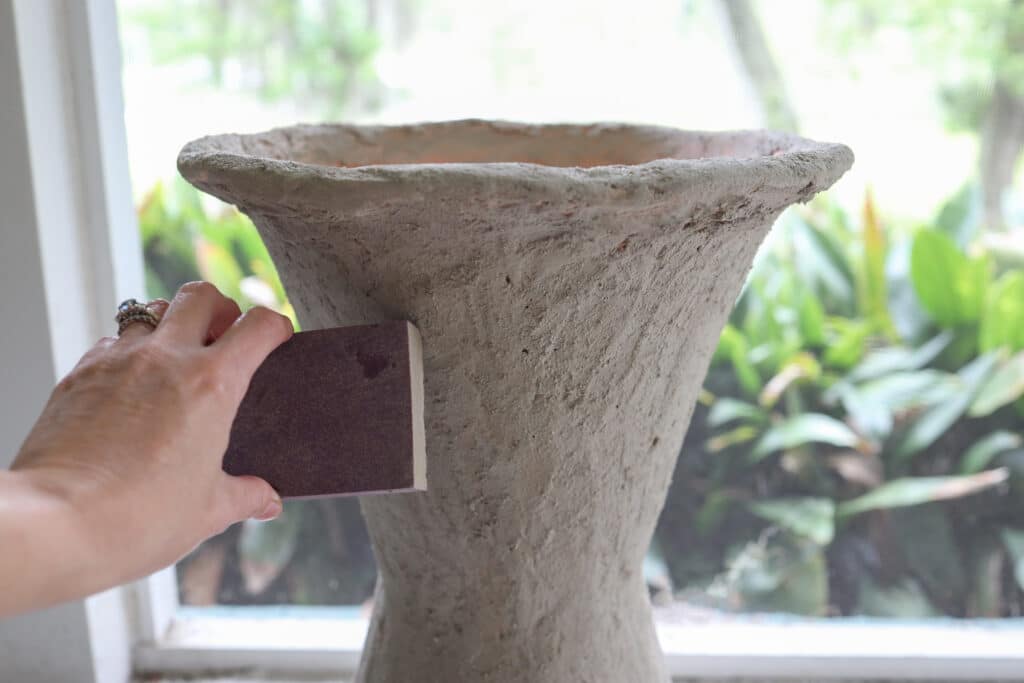
Step
7
Once the fast-setting cement has dried, the planter should have more of an aged crumbly concrete look. If needed, you can hand sand any raised areas with a medium-grit sanding block (be sure to wear a mask).
Step
8
Add potting soil and your favorite greenery or flower inside. I chose ornamental grass because I love to watch it when the wind blows.
*If you purchase something using one of the links in this article, we may earn a commission (at no cost to you). Rest assured we only recommend products we’ve vetted and loved.
More Stories...

The space is decked out in Semihandmade Moss Quarterline and Tahoe.

House flippers and mom-daughter duo Lacey and Audrey Soslow created the kitchen of their (buyers’) dreams.

Malene Barnett teamed up with designer Leyden Lewis to create a space representative of her work.