I spend a lot of time gazing out the window at night, counting the stars and trying to find the moon with my four-year-old twins.
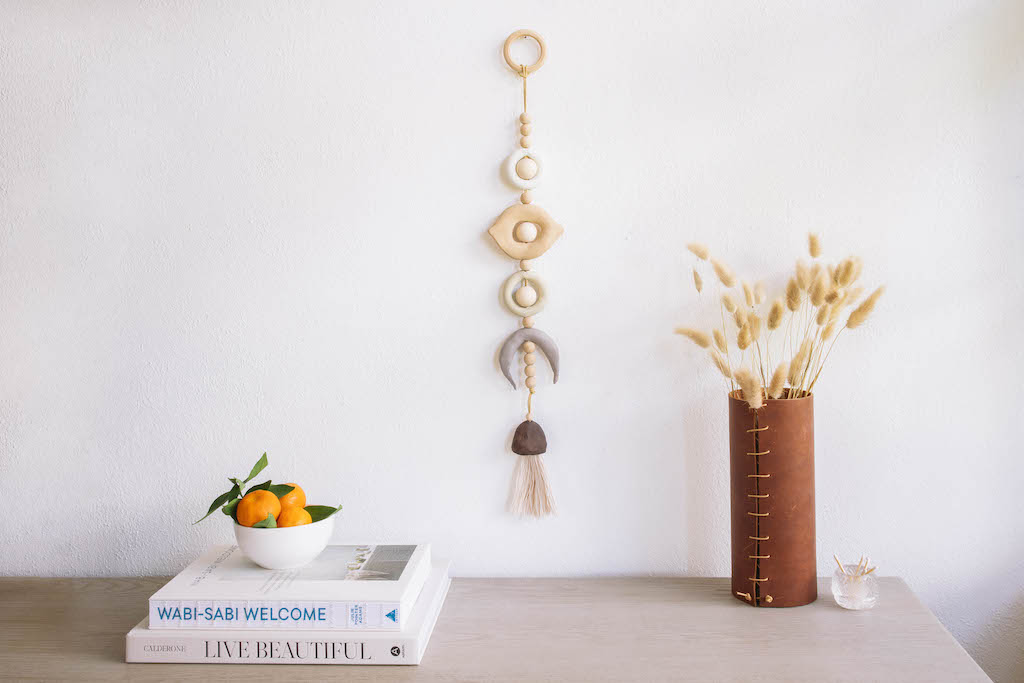
When they were tiny toddlers, my husband and I started a ritual of pointing out how the sun was setting and the moon was rising, signifying that it was time to get ready for bed. It worked great—until daylight savings time! But now they’re fascinated by the night sky and familiar with the different phases of the moon. So when I was trying to fill a blank space on my wall, I thought something lunar would be a fitting choice.
I fell in love with this West Elm wall hanging, and thought it’d be fun to recreate it using oven-bake clay. If I had to pick one material that I most enjoy working with for DIY projects, clay is definitely at the top of the list. There’s just something about squishing it between your fingers that’s so playful and nostalgic (hello, Play-Doh!). Plus, it’s a very forgiving medium, since you can always smooth out any mistakes and start over.
If you are in search of a stylish wall hanging that’ll brighten any blank wall of your home, then I have you covered. And if you have kids, ask them to join in!
Steps
Step
1
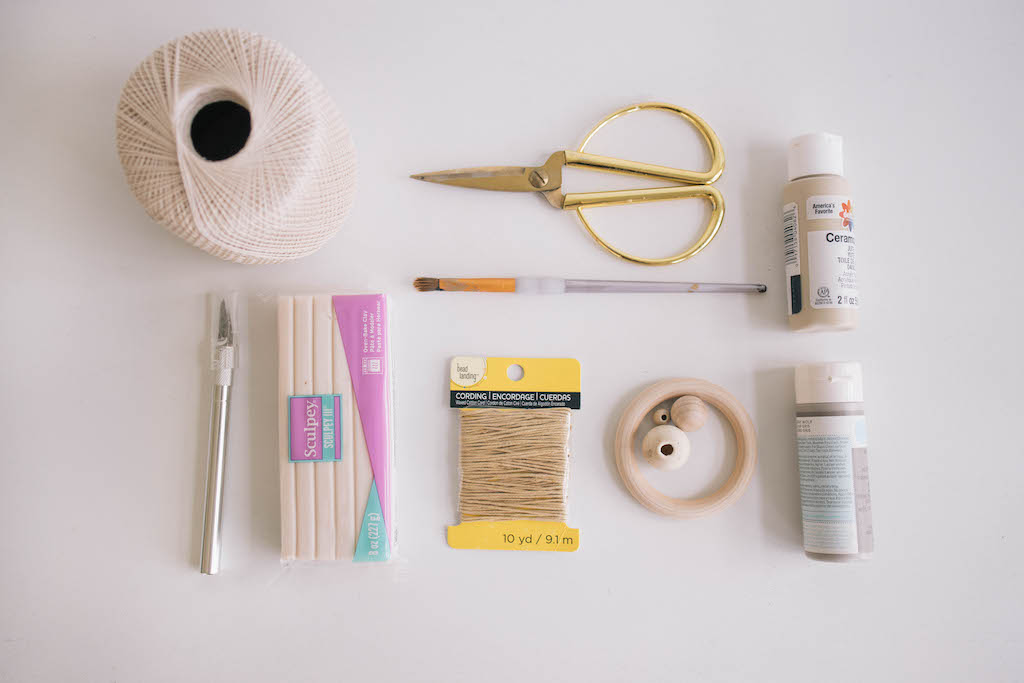
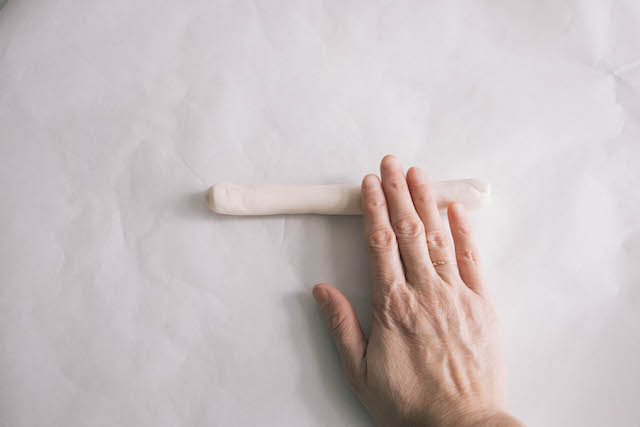
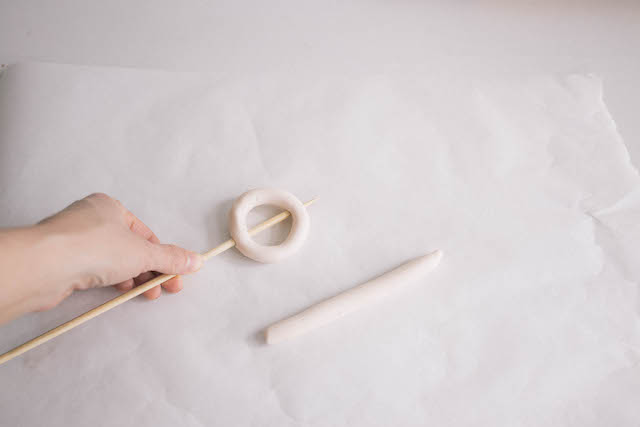
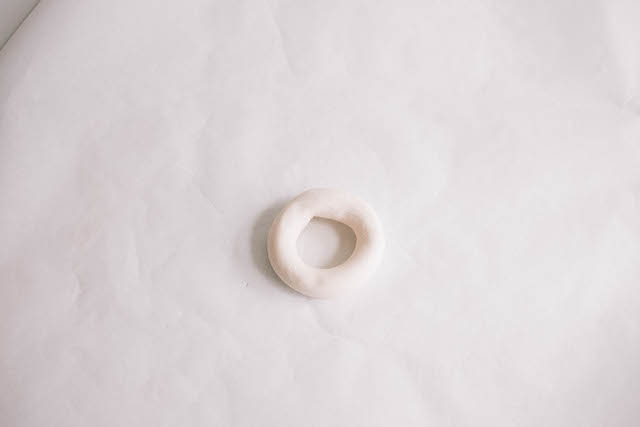
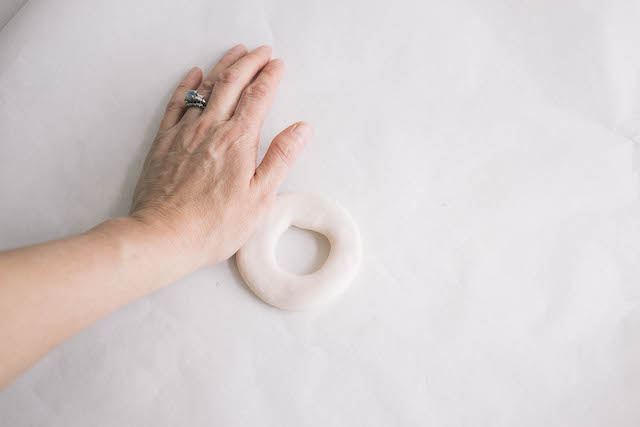
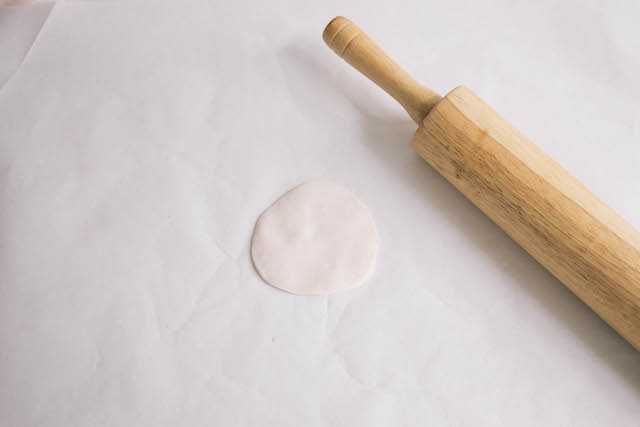
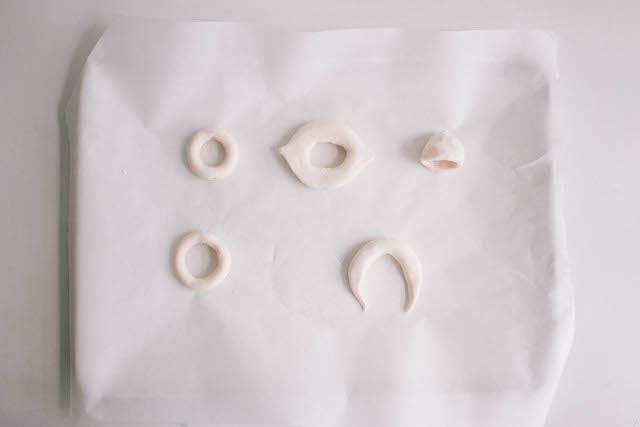
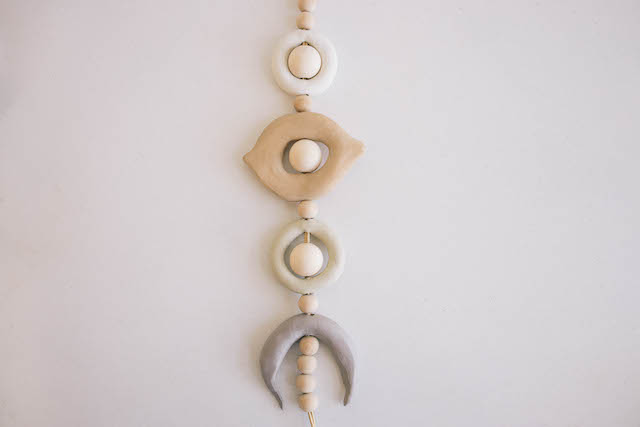
Start by making the clay beads, beginning with the full moon shapes. Place parchment paper on your work surface, and roll a piece of polymer clay into a five-inch log that’s about a half-inch thick. Form the log into a circle, and pinch and smooth the ends to close the loop. Thread a skewer through the center to create holes on the top and bottom of the circle. Repeat to make a second full moon bead.
Step
2
For the eye shape, roll a piece of clay into a six-inch log, and make it slightly thicker than the previous ones you rolled. Form it into a circle, and pinch and smooth the ends to close. Next, press the clay with the heel of your hand to flatten it slightly. Then, pinch the sides into points to form an eye shape. Thread a skewer through the center to form holes on the top and bottom.

Step
3
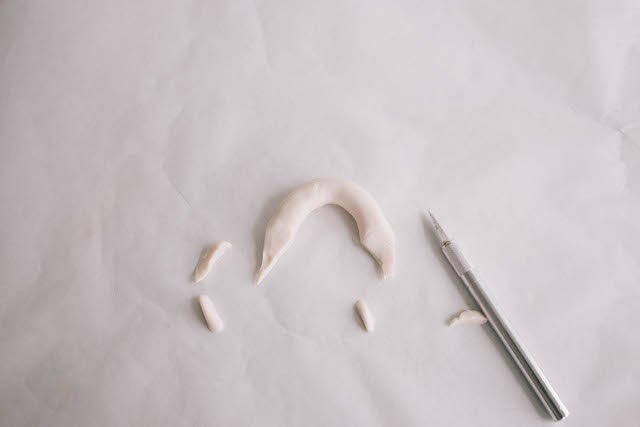
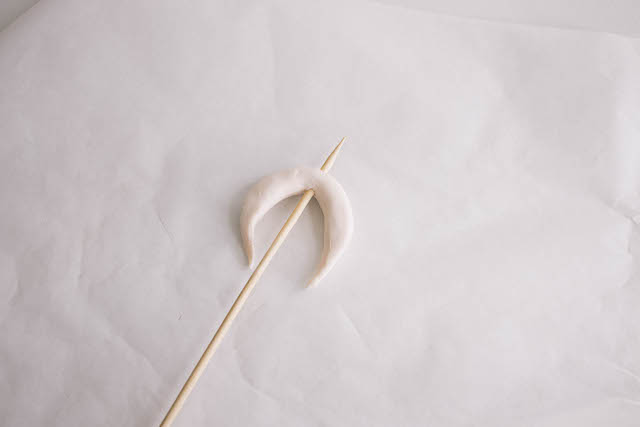
To make a crescent moon shape, roll clay into a five-inch log, and then form it into an arch shape. Cut the ends into points. Next, pinch and smooth the ends to form a pointed crescent. Thread a skewer through the center to form holes on the top and bottom.
Step
4
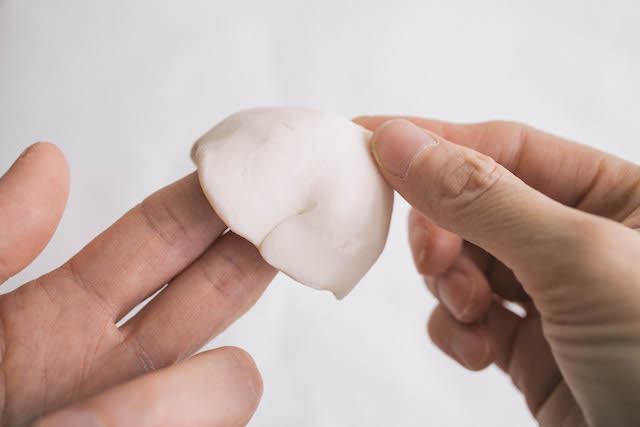
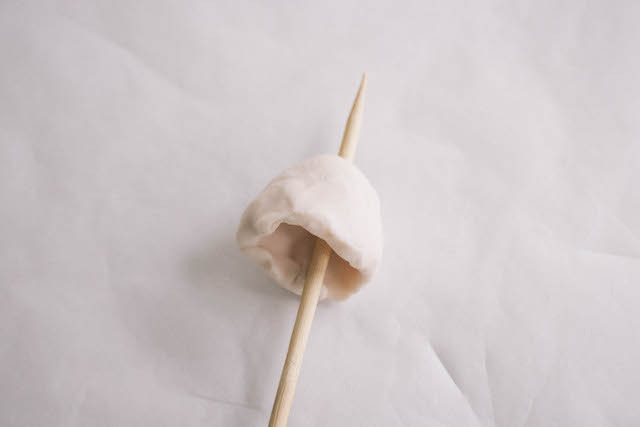
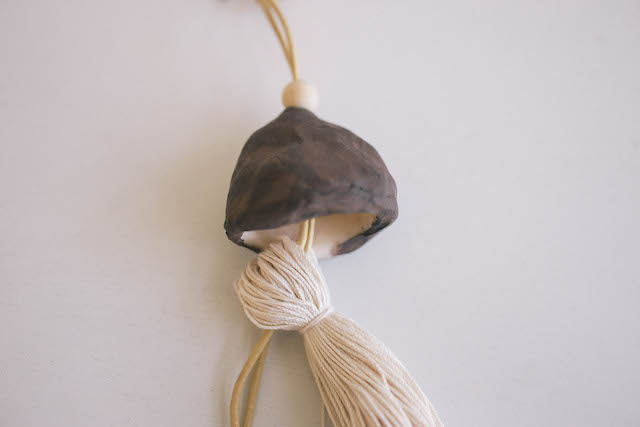
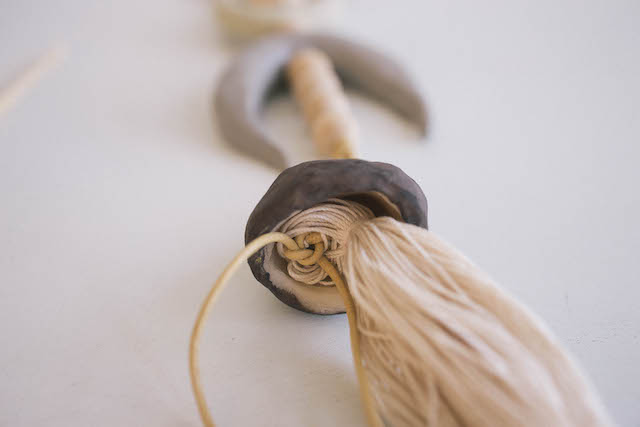
To make a bell shape, roll clay into a flat circle that’s about three to four inches in diameter. Drape it over your fingers to create a hollow center, and form it into a bell shape. Then, thread a skewer through the center to create a hole.
Step
5
Bake the beads on a parchment-lined baking tray at 275 degrees Fahrenheit for 25 minutes. Let the beads cool completely, and then paint them with your desired paint colors. I went with an earthy color palette.

Step
6
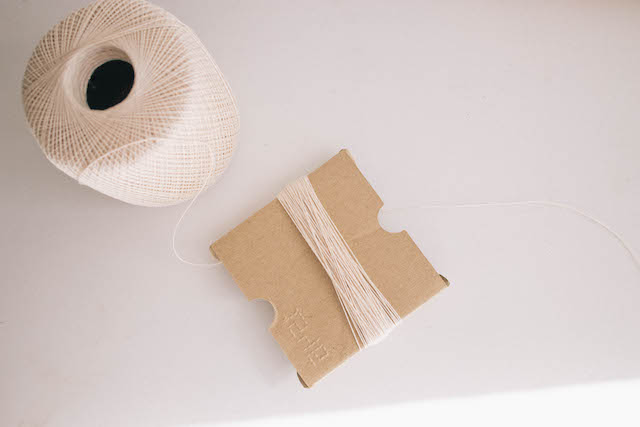
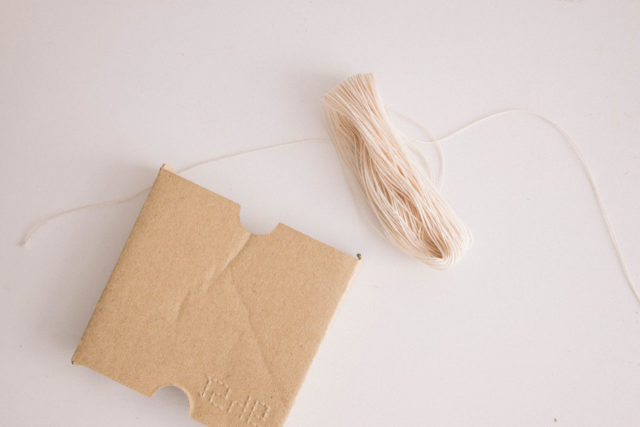
To make the tassel, wrap crochet thread or yarn around a four-inch piece of scrap cardboard, about 100 times (less for thicker yarn). Carefully slide the crochet thread or yarn off the cardboard, and cut it off from the spool.
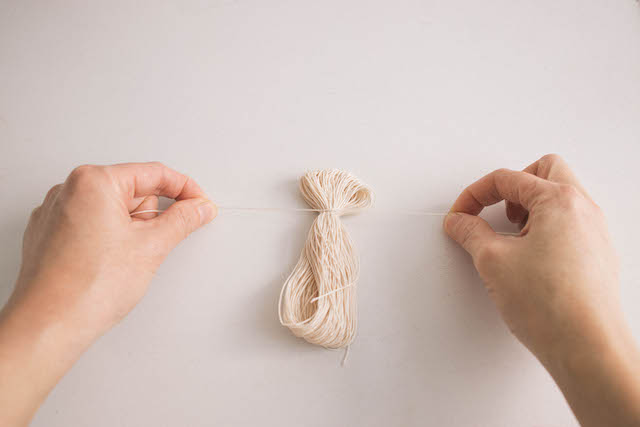
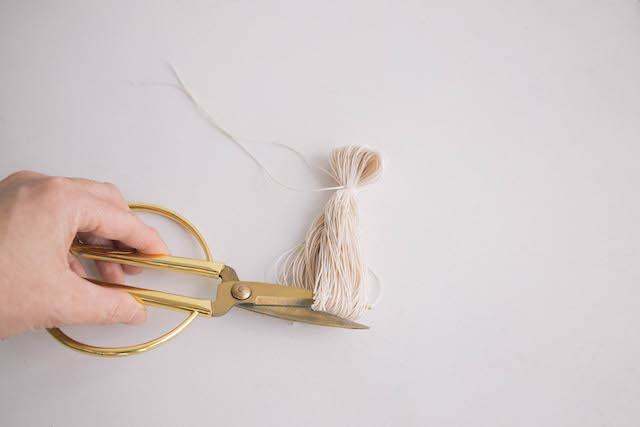
Next, tie another long piece of thread into a double knot around the looped thread, about an inch down from the top. Cut the bottom of the looped thread to create a fringe bottom. Trim to even the ends out.
Step
7
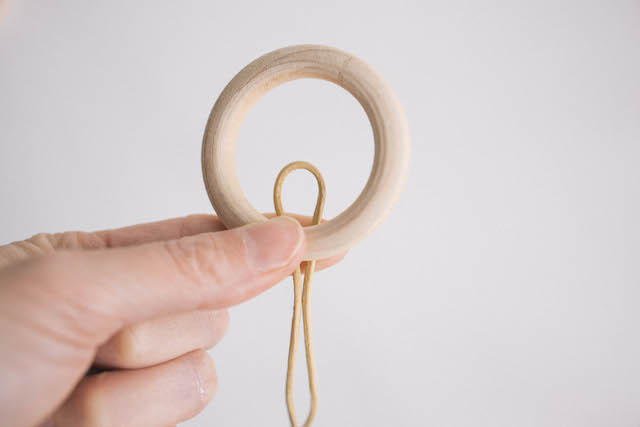
To assemble, cut a piece of leather cord to 48 inches long. Fold it in half and place the center loop behind a wooden hoop. Pull the two loose ends of the cord through the leather loop to attach it.
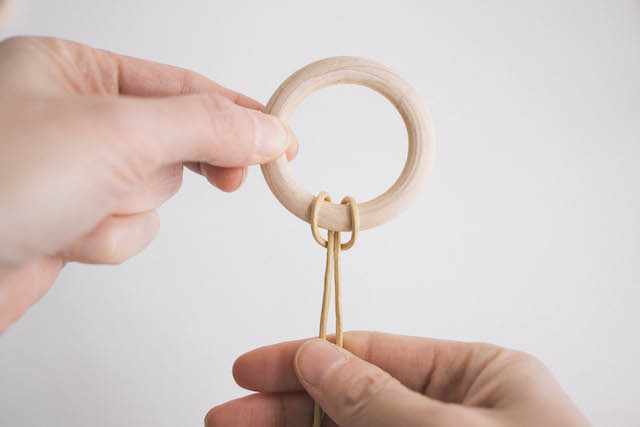
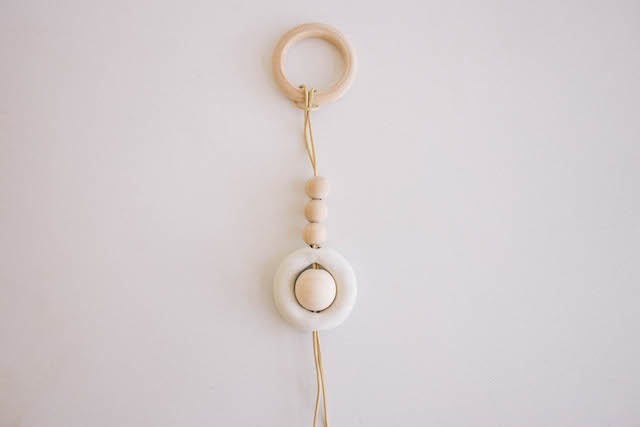
Next, thread both ends of the leather cord through three half-inch wooden beads, leaving a three-inch space from the wooden hoop. Then place a one-inch wooden bead inside a full moon bead, lining up the center holes, and thread the cord through them.
Continue in this manner, placing a half-inch wooden bead in between the clay beads and a one-inch wooden bead inside them, starting with the eye shape, another full moon shape, and then the crescent moon shape. Thread four wooden beads onto the cord after the crescent moon.
Step
8
Tie the cord into a knot under the four wooden beads. Then, string on a three-eighths-inch wooden bead about three inches below the knot, followed by the bell-shaped bead. Thread the cord through the top loop on the tassel, and pull until the top part of the tassel is hidden inside the bell-shaped bead. Tie the cord into a tight double knot to secure the tassel, and cut off the excess.
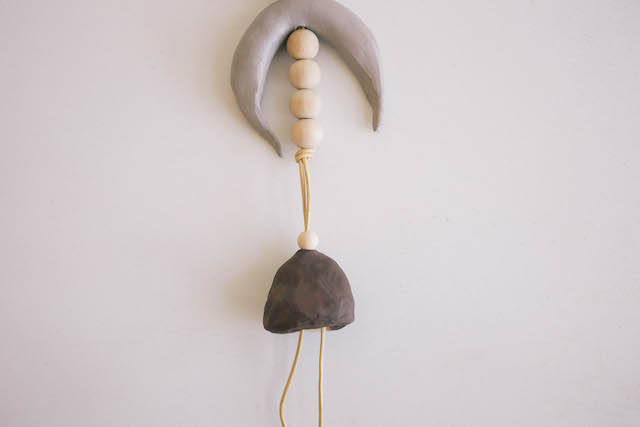
You’re all set to hang and admire the moon shapes—and your fabulous handiwork—on your wall.
If you buy something through these links, we’ll probably earn an affiliate commission—don’t worry, it won’t cost extra. We promise to only recommend items we’d buy ourselves!
More Stories...

The space is decked out in Semihandmade Moss Quarterline and Tahoe.

House flippers and mom-daughter duo Lacey and Audrey Soslow created the kitchen of their (buyers’) dreams.

Malene Barnett teamed up with designer Leyden Lewis to create a space representative of her work.