Since much of the world is spending an abundance of time at home these days, I know I’m not the only one who has grown weary of looking at the same four walls.
I’m lucky to have a safe haven, but I also have a running list of details that currently irk me about it. For instance, my wood floors are too orange and my kitchen is too dark. Bigger bathrooms would be nice, too.
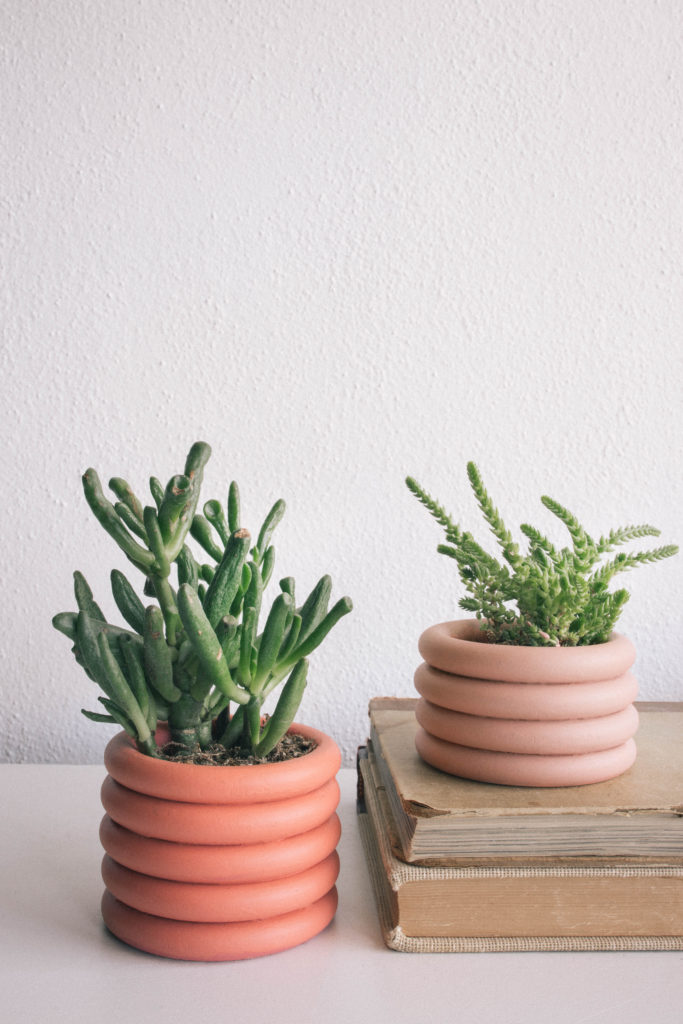
Nevertheless, I’ve come to realize that this type of thinking isn’t exactly healthy—and these bigger projects wouldn’t give me the quick change of scenery I crave. So for my first DIY project in this monthly column, I decided to create colorful stacked planters that can be accomplished in an afternoon. The best part? They look so cheerful on my desk.
By infusing a calming bit of nature and an eye-catching shape to my work-from-home views, these planters did just the trick to put my mind at ease. Follow my lead, and with very little effort, you’ll have trendy planters that’ll instantly perk up your space and mood.
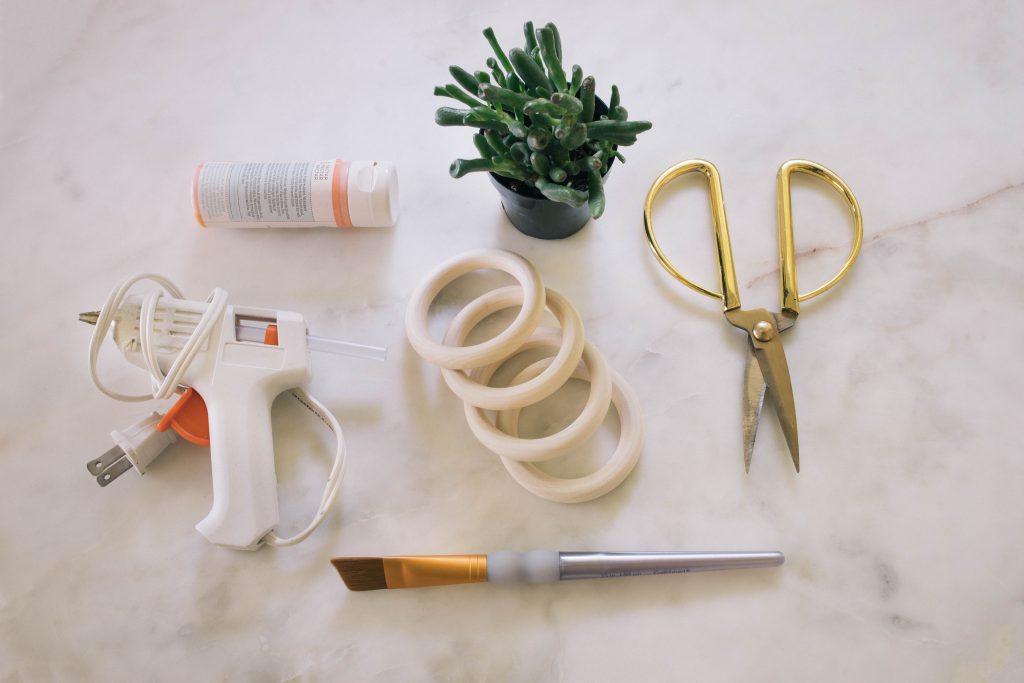
Steps
Step
1
Stack two wooden hoops together, and place the plastic pot that houses your succulent inside the hoops. Mark the height of the stacked hoops around the pot, and then remove the pot.
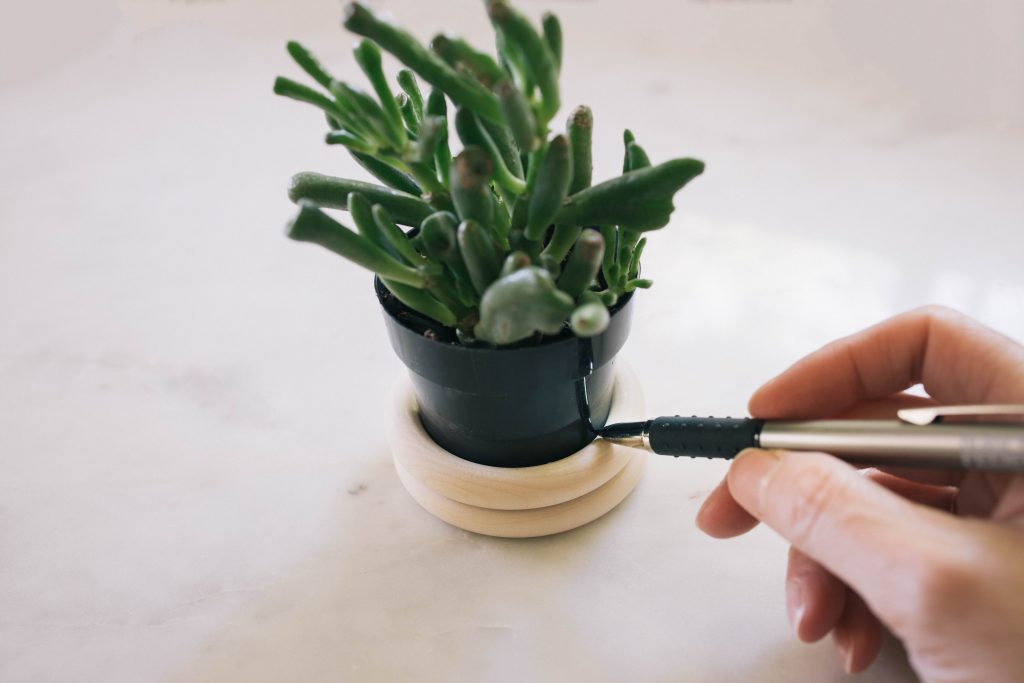
Step
2
Carefully remove your plant from the plastic pot, and use a utility knife to cut around the line you drew. Discard the top of the pot—you’ll only need the bottom.
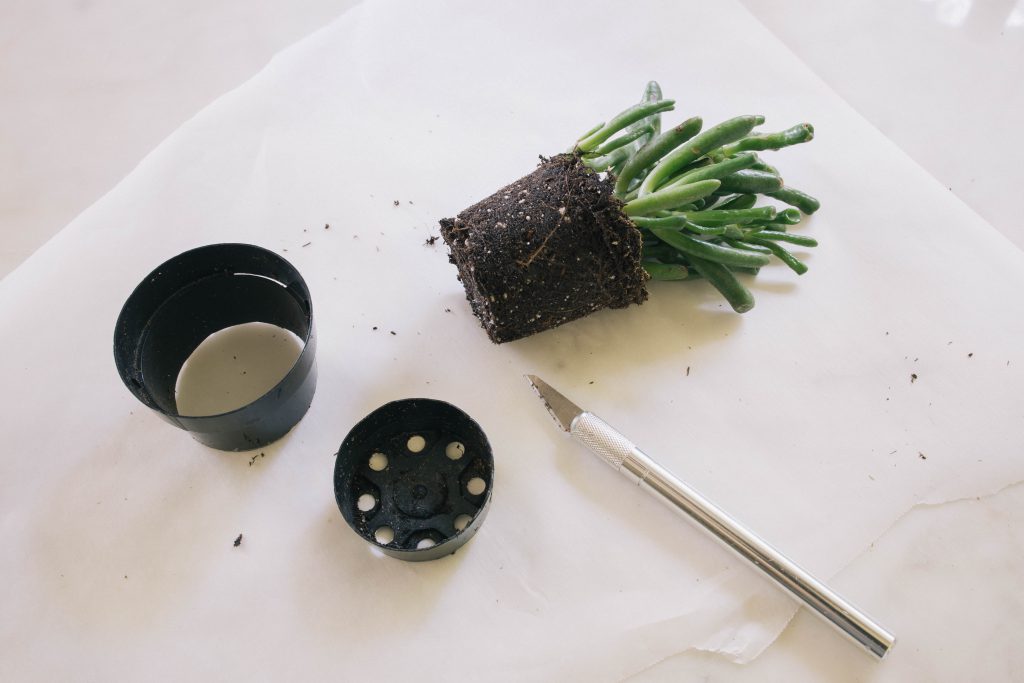
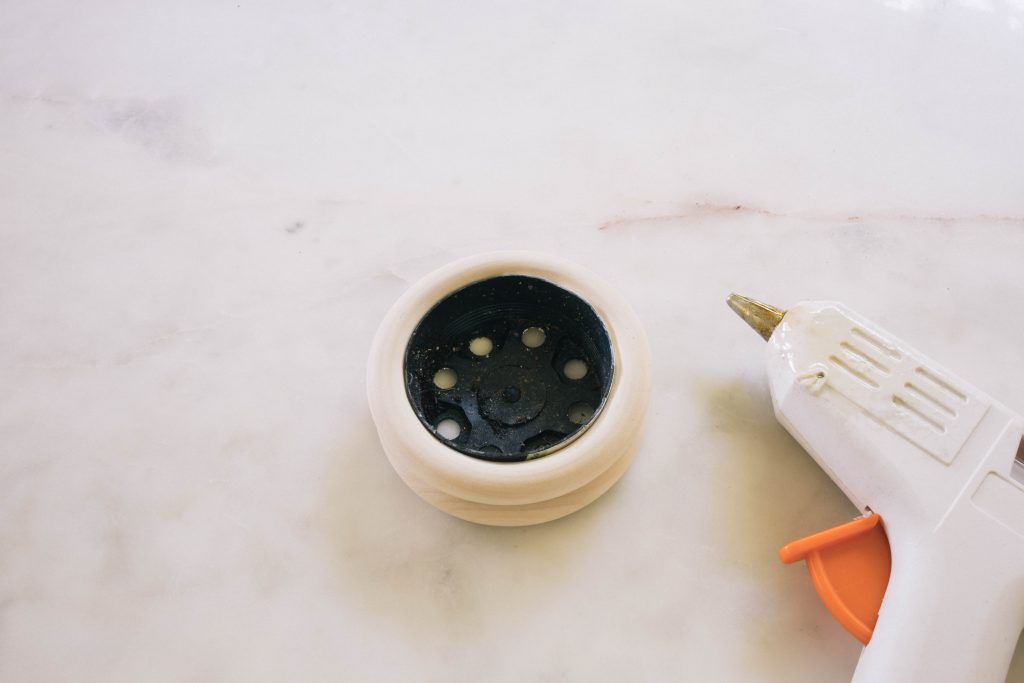
Step
3
Hot glue the two stacked hoops together, and then insert the bottom of the pot inside. It should be a snug fit, but hot glue the pot in place if necessary. Tip: If you don’t have a four-ounce plastic pot, you could cut a piece of landscaping fabric or burlap, and glue it to the bottom of the hoops as a drainage-friendly alternative.
Step
4
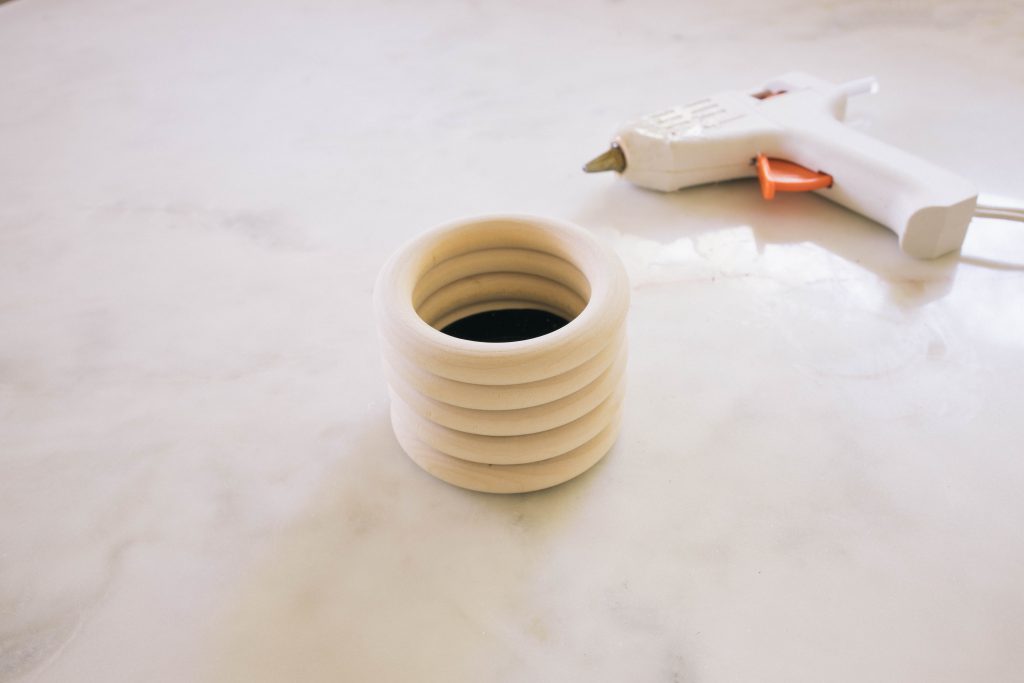
Stack additional wooden rings on top, and hot glue them together. I opted for four-ring and five-ring planters. Note: Be sure to place the glue toward the inner rim of the hoops to avoid it oozing on the outside. Go ahead, ask me how I know.
Step
5
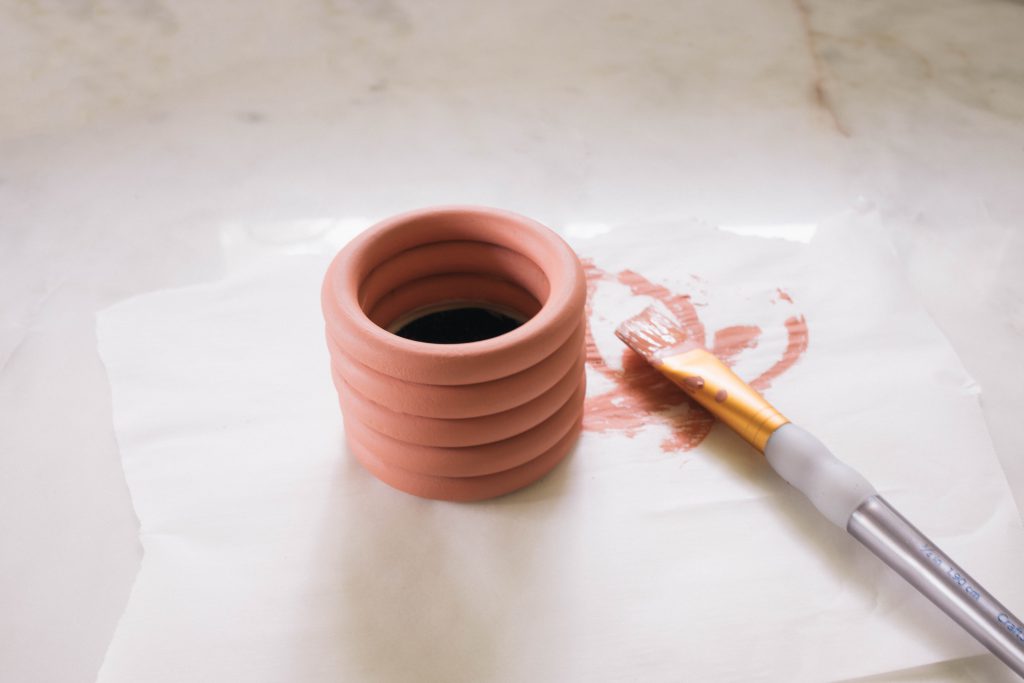
Paint your planter in your favorite color. You’ll likely need to paint two to three coats, allowing 20 minutes of drying time in between each coat.
Step
6
Once the paint has dried, loosen the roots of your succulent, and plant it inside the planter. Be sure to place it in a sunny spot, and water it whenever the soil feels dry.
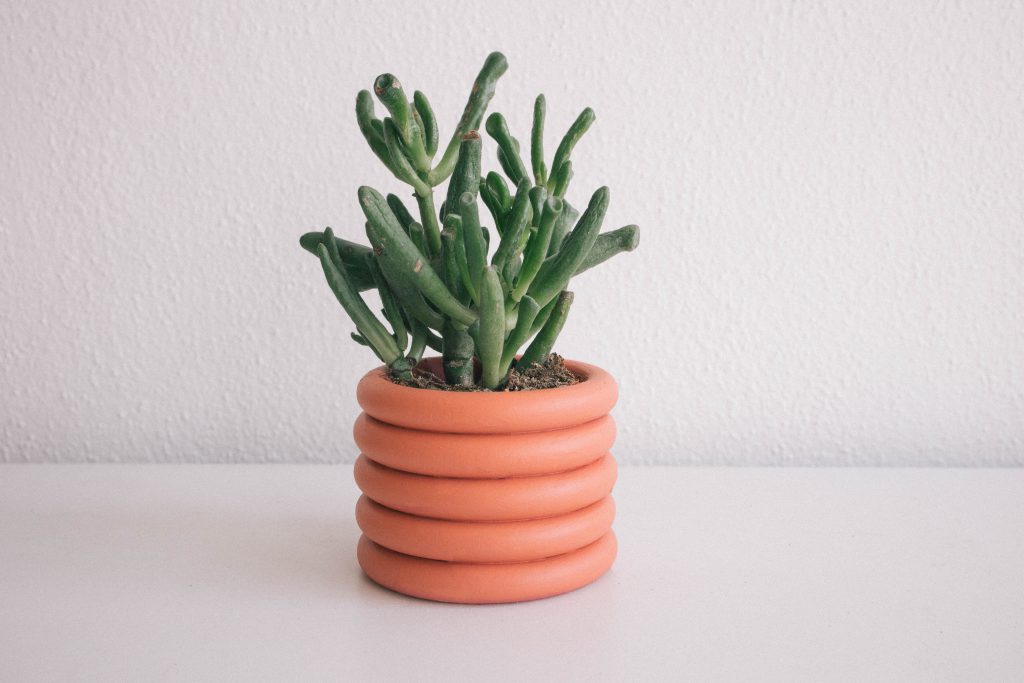
See how easy that was? I personally love how something so small can make a significant impact on my space and completely shift my attitude. And pssst: They also make great gifts!
If you buy something through these links, we’ll probably earn an affiliate commission—don’t worry, it won’t cost extra. We promise to only recommend items we’d buy ourselves!
More Stories...

The space is decked out in Semihandmade Moss Quarterline and Tahoe.

House flippers and mom-daughter duo Lacey and Audrey Soslow created the kitchen of their (buyers’) dreams.

Malene Barnett teamed up with designer Leyden Lewis to create a space representative of her work.